Friday, September 18, 2015

Better than perfect cupcakes....

I have a belly ache. And a problem:

I happen to have an evening to myself and what do I do? I get my kitchen scale out and start weighing flour, sugar, oil, etc. I turn my oven on for the fourth straight day in a row in the middle of a blistery hot summer. Why do I do these things?

Because after my last post about making the perfect vanilla cupcake, I ate a leftover one today and I was disappointed. The flavor was great. The moistness was good. But the crumb...that darn crumb...was too big for my liking (too big of airy holes). I wanted a fine-textured crumb. At least finer than what I previously made.

Don't get me wrong: the other cupcakes are still good basic cupcakes. But I wanted better. Time to stop guessing and experimenting and attaining pretty good results. Time to get out the calculator, do some basic math and ratio calculations and finally put this baking experiment to a rest. Time for "better than perfection." My tummy needed it: soooo much tasting. And re-tasting.

Here is what I knew I wanted for this recipe:

1. It had to be easy. I didn't want a "The Joy of Cooking" choose-your-own adventure baking process of dirtying a billion dishes and performing a zillion steps before finally putting the batter in the oven. I want to mix it up in a few steps with a couple dishes and move on with my life.

2. It had to be quick. Refer above to the "Joy of cooking" analogy. I wanted to be able to pull out ingredients that are pretty mainstream, that require no additional cooking or heating or taking temperatures, etc. I just wanted to be able to throw it together quickly. Because that's the beauty of a boxed cake mix: it goes together super-quick. But I want something from scratch that goes together just as quick.

3. I knew I wanted to use oil instead of butter for a couple of reasons. Number 2 above (being quick) was a big factor. I didn't want to have to take butter out of my fridge and either leave it on the counter long enough to get to that elusive stage of being somewhat softened, but still cool. Leave it out too long in my kitchen and I'll have a greasy buttery mess. And I can try to put it in the microwave on 30 percent power or something, but I still end up melting part of it, which can be fatal to a baking recipe. **update: I tried this recipe with melted butter and it tastes good, but is a little more dry than just using the oil.

My second reason for wanting to use oil is because it usually makes a more moist cupcake. And I was going for moist.

4. Really fine (small) and tender crumb. That's the reason I kept baking: to get a finer crumb. I prefer this texture and mouth-feel.
Do you see that fine texture?! These cupcakes are velvety smooth


5. It has to taste good. Obviously. Isn't that why I bake? But they all (the gazillion batches of cupcakes I made) tasted good. I'm kinda tired of the taste of vanilla cupcakes, or any kind of cupcake. Or baked good. Or sugar. Yesterday my brother asked me in all seriousness if I was depressed after I turned down a cookie at his house. Ha ha ha ha. No, I just am sick of baked goods. Don't worry, it won't last too long. It never does.

So, I had to follow some basic cupcake and cake ratios to make my cake. Baking is a science, and you have to stay within certain parameters of ratios of ingredients without straying too far, or your recipe will fail. You can still get creative, but you have to follow the basic rules. So what are the basic rules of making a butter or oil cake? (which is the kind of cupcake I was wanting to make--as it has the texture and crumb I was going for). If you don't want to know about the rules, feel free to skip down to the recipe. You may not care how I got there.

RULES FOR CREATING A CAKE RECIPE:

1. The weight of your sugar and the weight of the flour have to be roughly equal. The sugar can weigh a little more, but it has to be close. And this is by weight, hence me getting out my digital kitchen scale for this.

Sugar is not just for sweetness, but it is also a tenderizer. So not having enough can make your cake tough. And having too much might cause your cake to fall or not set up.

I started my recipe with the sugar. I decided to start with 1 cup of sugar to base all the other ingredients off of that. I weighed the sugar. One cup of my sugar was 7.8 oz. That meant that my flour needed to be around that. So I weighed flour and found that with my cake flour, 1 2/3 cup was 7.6 oz. Pretty darn close. So now I had my flour measurement. More flour than that would make the cake dry and tough.

2. The eggs and the fat should weigh roughly the same (or the eggs slightly more than the fat). 
I knew my recipe needed at least one egg, and I also wanted to use the yolk from another egg. Egg whites tend to dry out baked goods, and remember I am aiming for moist. So after weighing an egg plus a yolk together, I knew I needed the same weight in oil. I  measured the oil to figure that out. Whole eggs are about 1.75 oz, and a yolk is about 0.66 oz for anyone who wants to go through this process for themselves.

3. The eggs + the liquid need to weigh the same as (or more than) the sugar. My sugar weighed 7.8 oz, and ny egg/yolk weighed about 2.4 oz, leaving me to find 5.4 oz of liquid. I knew I wanted to use milk, so I weighed out milk and it turns out that 2/3 cup of milk was 5.4 oz. of liquid. Hooray.

So those are the basic rules. I still needed to add flavor (vanilla extract, salt), and leavening agents (baking soda and baking powder). You can use roughly 1 tsp of baking powder per cup of flour, so I decided to use 1 1/2 tsp. baking powder for my recipe. You can use about 1/4 tsp. baking soda per cup of flour, and the same with salt (about 1/4 tsp. per cup of flour). However, in this recipe I don't use baking soda at all as I don't have acidic ingredients in the recipe that need the aid of the baking soda (a base). That's a chemistry lesson for another day.

And that gave me all the measurements for a basic vanilla cupcake that would come out right. Now, within these rules is a little wiggle room (about 20% of so) for you to experiment with. Getting too far away from these ratios will be trouble. But I wanted to experiment with more moist and finer crumb. So I adjusted some things again for the result I was aiming for (I guess more experimenting was somewhat inevitable).

The method for how you mix the cake is quite important for texture too. I grew up using the "creaming method" (where you cream the fat with the sugar first). This is good if you want your cake to rise tall. But there is a different method, called the "two-stage mixing method," which is better for tenderness, and bonus: it's simple. So that's what I chose.

And now, I'm done with the recipe for vanilla cupcakes. At least this month! :)

Better Than Perfect Vanilla Cupcakes
will make 12 cupcakes as written. Double amounts for 24 cupcakes

Ingredients

1 cup sugar
aluminum free baking powder
1 1/3 cup sifted cake flour
1 tsp. aluminum free baking powder (this will make a finer crumb than regular baking powder)
1/2 tsp. salt

1 egg + 1 yolk
1/2 cup vegetable or canola oil
1 1/2 tsp. pure vanilla extract

1/2 cup whole milk

Directions

1. Preheat the oven to 350 degrees F. Prepare your cupcake/muffin trays with either placing cupcake liners in them, or grease with vegetable oil.

2. In a stand-mixer (or large bowl if you don't have a stand mixer) combine all the dry ingredients: sugar, cake flour, baking powder, and salt. With paddle attachment (or whisk by hand) mix on low speed for about 30 seconds to evenly distribute all of the ingredients. 


3. Measure out oil in measuring cup and add the eggs/yolk and vanilla. Whisk together. Add 2 Tbsp. of the milk to this mix and stir. 
I mixed egg, oil, vanilla with a fork


I measured out my 1/2 cup milk and then spooned 2 Tbsp. into the egg/oil mixture


4. Add the egg/oil mixture to the dry ingredients and mix on low speed until moistened. Then increase speed to medium and mix for 2 minutes, stopping to scrape down the bowl at least once in the middle. 


5. With the mixer on low, add the remaining milk (the 1/2 cup minus the 2 Tbsp) in two additions, allowing to mix about 20 seconds after each addition (until the mixture is combined).
pouring in first addition of milk

finished batter after the two additions of milk

6. Scoop batter (I use a large cookie scoop for this) into prepared muffin tins, filling each cup about 2/3 full. Immediately place in your preheated oven and bake for 20 minutes, or until top is springy and toothpick comes out clean. Do not over-bake or they will be dry. 


fresh out of the oven

So there is my perfect (better than perfect apparently) vanilla cupcake recipe that I'll use forevermore! Yippee!

And they are oh-so-good. My mouth is happy. And so is my pride....
Now that's one perfect cupcake!
Gotta love that texture!

Thursday, September 17, 2015

I'm Surrounded!

....by ____________! Fill in the blank, and you're probably right.

Crackers that my toddler threw on the floor and I'm tired of sweeping up, so they're still there. 

Embroidery floss balls filled with different colors and floss bits of varying thicknesses of strands because instead of acting like a normal person and throwing pieces away, I think "but maybe I can use this somewhere!" 

Little cut pieces of thread and fabric. They have ended up everywhere. Here is where if you're a sewer you should comment below on tips that I obviously could use to prevent this from happening. 

Checker pieces that aforementioned toddler carries around like little treasures and refuses to clean up. But hey, she's learning her colors. "Red, and black!"

Papers from school from older kids on the kitchen island...books from older kids left in various places. 

Oh there's so much more. I had to stop typing about it, because I was starting to realize that I really need to clean, and I chose to go back into denial about it.  

But what I really mean is:

I'M SURROUNDED BY STUFFED TOYS!! It's a bit of a problem.

Circle of Friends
For those of you who want to psycho-analyze: maybe I didn't have enough stuffed animals while growing up. Mom, if you're reading this: BREATHE. I actually had plenty of stuffed animals growing up (my mother can attest to that).

Maybe it's because Mom would sneak into our rooms while we were gone and pick some of our toys that hadn't been played with in awhile and get rid of them. She learned this from a family friend who was a psychologist. He told her we (my siblings and I), would never notice. Well let me tell you: I noticed!! It also created a sense of panic because she told us about her plan, so you never knew when your favorite stuffed Christmas dog in a Christmas sweater from Target would go missing. Wow, I'm getting off topic. I had a wonderful childhood, and I can't say that I haven't ever "accidentally" gotten rid of a junky toy from my own children when they're not around. I get it, Mom. I get it. 

Maybe it's because stuffed toys love you unconditionally. Ok, now this is getting a little too personal. Whose idea was it anyway to invite you to start psychoanalyzing? Whoa there...slow down, Son.

Smily face. We're all good. 

Nah, I'm surrounded by stuffed toys because I've been sewing up a storm and developing some new sewing patterns. In addition to the giraffe that first started my animal rag dolls, I have added the fox, a raccoon, and an owl. It has been so fun to pick out fabrics to go with each animal. I have been working on an elephant too, but that is giving me some trouble. Argh!


Each new final pattern for a doll means that I've made at least 4 or 5 different dolls along the way as I tweak the pattern. That means that I end up having a LOT of stuffed dolls lying around. It's great for the girls; they love it. The Bean loves all of them because she's 2. The "Go" has her own obsession with stuffed animals, so I'm somewhat of an enabler there. But she gives me valuable feedback on the dolls. Even the Bud has received a couple of the more masculine toys...but I think I may have to do some minecraft plushies in the future for him.

So yes, that's why I'm surrounded by toys. It's not so bad. Makes me feel young again...for a minute. And then my hip pops loudly as I attempt to chase a naked toddler who has recently discovered the joy of running in the nude. She has an expression of sheer glee on her face as I shriek (because the diaper is OFF, folks!) and chase her down. And I remember: I'm too old for this.

The Owl and Giraffe were not getting along, so they had to sit apart. Trying to get them to behave was like trying to calm a bunch of wild animals! ;)

When the elephant is finished, I'll post that. I'm sure he'll make a great mediator between the giraffe and owl (see caption on picture above).

You can find those animals and more here.


Monday, September 14, 2015

A Sweet Bookmark for a Sweet Birthday Girl!

My oldest niece just turned 16 years old. It's hard to believe. I still remember my sisters and I following around endlessly (probably inadvertently harassing) the big-eyed, toddling towhead who was then all alone in soaking up the abounding aunt-y love. Today she has 4 younger siblings with whom to share the love....and harassment.

She has grown into quite a beautiful, sweet, good-hearted, upstanding young woman with a twinkle in her eye for mischief (which she usually bestows on her next-in-line sister), and an appetite for books. She reads all the time. So what do you get a 16 year-old avid reader for her birthday?

I knew I wanted to get her a book, but what to go with it? A bookmark! Since I like making cute little animals out of felt, the idea grew from there.

And here is the finished product:


A cute little sugar cookie (don't forget the sprinkles) bear peeking out of a book, just waiting for you to open the book up to continue the reading adventure!

I hope she likes it.

Happy Birthday Megs!!! You're an amazing young woman.

Wednesday, August 19, 2015

How to Digitize Your Hand-Drawn Patterns: the easiest and fastest way!

Maybe you've toyed around with the idea of digitizing your hand-drawn patterns. You've put the time and the effort into creating something, working out the problem areas, and finally you have a pattern that you're proud of. Your final draft. Whether it's for sewing clothing, crafts, or home decorations, you've come up with some patterns that you enjoy, and maybe you'd like to share them with the world.

Maybe you have a shop online at craftsy or etsy or the like and have tinkered around with the idea of trying to sell these patterns. You've done all the work, so why not? And if successful, they could bring in money, potentially even while you sleep. 

If you're like me, you've thought about it, but you don't really know how to use Adobe Illustrator or Photoshop. Being a do-it-yourself-er, you look on Pinterest and google: "how to digitize your patterns." You come across some promising tutorials, read them, do your research, and try them out.

Then you realize something: you don't have enough hours in the day to figure this out in a reasonable time-frame. The tutorials are helpful, but can't give you all the info you need. Sure, you're making progress....very slow progress. You want to throw your computer across the room after a bit. 

Maybe you could take an e-course for $100 or so on how to figure out Adobe illustrator....but that takes time and money, both of which are valuable to you. 

So what are you to do? Not all of us have a sister who is a talented graphic designer (lucky me) and who accepts cookies, cakes and toys for her children as payment...which you'd do anyway. So in reality, she's doing it for free...

So what is the absolute easiest and fastest way to digitize your patterns professionally?! 

You're in luck: I'm gonna tell you:

How to Digitize/Turn Hand-drawn Sewing Patterns into Vector Files 


Step 1.  Go to www.elance.com. ***UPDATE: it's now www.upwork.com!!

This site is where you can hire someone from anywhere in the world who has the exact skills you need to do your job for you. It is free to post a job (i.e. "turn my hand-drawn pattern pieces into vector images"). Don't be scared of this: it's easy, and it doesn't cost much money to hire someone since they can do the job fairly quickly and they know exactly how to do it. It's their job. It's all they do. 

Still not convinced? Hear me out:


Step 2. Under the "HIRE" section, click on "post a job."

Hire someone? But doesn't that cost money? Yes, but you choose who you hire, and you can even say in your job description the amount you're willing to pay. And don't forget that your time is worth something too. You can take hours and days and weeks trying to learn a program, or you can give this a try too.

I'm not trying to discourage you from learning a new skill if you want to go that route. This is just a post on the "easiest and fastest" and least painful way to get the job done. 

Step 3. Fill out the "Post Your Job" form and submit it

Fill out the section "Name of your job." Say something like: "Need hand-drawn craft pattern turned into vector images." 

Then (under "Describe It") you describe concisely what you need to have done. (i.e. "I have a hand-drawn pattern for a fox toy that I need to have converted into vector images using Adobe Illustrator. I have 4, 8.5 x 11 inch pages that need to be converted, and I have attached an example of the first page to give an idea of what the project entails. I would also need text added--i.e. cut 2 from fabric A--to the pattern pieces.").

You can add an attachment of one page of your pattern (that you have scanned) to give the designers an idea of what the project will be. And converting this type of project into a vector image is easy for a graphic designer, so adding the attachment is a good idea because your easy job will attract the graphic designers. 

Under the drop-down screen titled "Select the Category of Work," choose: "Design and Multimedia." A second drop down menu then appears for you to choose from. Choose: "Illustration."

Under "Request specific skills or groups," I chose "Adobe Illustrator." Then to the right of that, a section appears called "Selected Skills." It automatically will have "graphic design," "Adobe Illustrator" and "Illustration." You can add up to two more if you'd like (i.e. "pattern making.")

The next section is "Set Work Arrangement." This is where if you want, you can fill out how much you're willing to pay. But I think it's best to not fill this part out (it is an optional section) because the graphic designers who respond to your job posting will tell you what they'll expect as payment, and you don't want to limit who responds.

Then you submit the form. It will give you the option to pay to have your job listing promoted, but this is completely unnecessary. Choose the "free" option and you will still get plenty of people willing to do your job at a reasonable price. 

Step 4. Wait for the Job Proposals to Roll in

Within minutes (usually), multiple professionals send you their qualifications and you can click on their portfolios to view their work. They BID to get your job. You have your pick of multiple talented people who have the skills that you need. Each person has been rated by their past customers (so you can read their reviews), and you can see how many jobs they've completed and what country they're from and so much other helpful information.

It is an amazing world we live in.

Step 5. Hire Someone to Get it Done

When you're ready, you choose who you hire. You have to verify your account (with PayPal or a credit card) before you can hire someone, but you only pay when you're satisfied and the work is done. And it will be done quickly. And accurately. And the professional can give you the files in the format you ask for and you can revise things along the way if needed. 

You choose which proposal looks the best to you (reasonable cost, skills you're looking for, etc.), click on hiring that designer, and then after they accept the job, they do it for you. Quickly!!! So much quicker than you would have figured it out. And isn't your time worth a little money? All you have to do is scan and email the files, and it is all done directly on e-lance.

Within a short time period (most likely a week at most), you will have the pattern pieces in the files that you need and you can type up the instructions for your pattern yourself. 


See...wasn't that easy?? I think sometimes people (myself included) get stuck at this part (digitizing your pattern) because you don't know how to do it or where to go to have it done, or you think it's going to take a lot of time, money, and effort. But doing it this way is painless and easy

So whether or not you're digitizing your pattern for yourself, to offer for free on a blog, or to sell (which would pay for itself in no time), you have a professional pattern that is still your original design. And oh so easy to have done. Yay!

And no, I was not asked by e-lance (or upwork) to do this. I just think it's amazing. There are other sites too that offer similar services (like fiverr.com). I just found e-lance to be very user-friendly. Feel free to search for other sites too. The world is at your fingertips. 

See? I told you it was the easiest and fastest way to get your patterns digitized.

Now go sell that pattern. Or post it. Or whatever you want to do with it!


Wednesday, July 15, 2015

Perfect Fluffy & Moist Vanilla Cupcakes

I hate the word "moist." But I had to use it here, because no other word would convey the correct description of these tasty little cakes. I guess I could have called it "Perfect Fluffy & Not Dry Vanilla Cupcakes," but that just doesn't quite capture the texture of these beauties.


I love cakes and cupcakes that have a tender and moist crumb, while still being light and fluffy. That's a hard standard to live up to. But here they are: perfectly moist from-scratch basic vanilla cupcakes. It's the best, Jerry, the best! They have a great vanilla-y sweet flavor. And look how beautifully these babies rise and dome ever so slightly, just like a good cupcake should behave.
Small crumb that is light, while still being moist and tender


I won't tell you how many cupcakes I made and ate (and my family ate) in the attempt to create this recipe, mostly because I lost count. But I will tell you that I have eaten a lot of vanilla cupcakes. A lot, people.

The process of finding the perfect combination took a lot of tweaking of ingredients: amounts of sugar, amounts of liquid, whether or not to use butter, how to mix the ingredients, etc. Little variations changed the texture: from too moist, to rubbery, to too sweet,  to too large of a crumb, to a fine crumb, to finally: a moist and tender crumb with the right amount of sweetness, counterbalanced with the perfect amount of saltiness. I am finally satisfied.

Even though these little cakes don't have butter in them, they taste nice and buttery. Mmmm.


Today is my Grandma and Grandpa's 69th wedding anniversary. Sixty-nine years! Can you believe that? To help celebrate I made some of these vanilla cupcakes to share with them, family, and the staff and residents of their retirement home. Happy Anniversary Grandma and Grandpa!

Perfect Fluffy & Moist Vanilla Cupcakes

(makes 24 cupcakes)

3 cups cake flour
1 1/2 cups granulated sugar
1 1/2 tsp. baking soda
1 tsp. salt

3/4 cup whole milk
1 Tb. pure vanilla extract

1/2 cup sour cream

2 eggs
1/2 cup oil

1. Preheat oven to 350 degrees Fahrenheit and place rack in lower third of oven. Prepare 2, 12-each cupcake baking trays by lining them with cupcake liners (24).

2. In bowl of stand mixer (or regular medium bowl if you don't have a stand mixer), place the cake flour, sugar, baking soda, and salt together. Mix together on low speed for a minute or two until all the ingredients are well combined and the flour mixture is well aerated. 

3. Mix the milk and vanilla together in a liquid measuring cup or bowl.

4. In a separate bowl, whisk the eggs and oil together for a minute or two until the mixture is light yellow and thick. Gently whisk the sour cream into the eggs/oil. Gently pour in the vanilla/milk into the egg and sour cream mixture. Mix gently with whisk.

5. With the mixer on low speed, pour the liquid ingredients (they should all be combined now) slowly into the dry ingredients until well combined and smooth (about a minute or two).

6. Pour batter into cupcake liners in the baking trays until the liners are about 2/3 of the way full. Place baking trays in the oven and bake for 18-20 minutes, or until a toothpick inserted in the center comes out clean (or almost clean-maybe a moist crumb or two). Don't overbake.

7. Remove from oven and allow to cool on rack for a minute before removing cupcakes (in their liners) to fully cool on a cooling rack. Frost as desired when they are fully cool. Enjoy!!


UPDATE: If you want a cupcake with an even finer crumb and even more velvet texture....try this post here!


Wednesday, July 1, 2015

putting your ragdoll/softie together part 3: sewing limbs, stuffing and finishing

This post has been a long-time coming. My apologies! Today we are going to finish up making our rag dolls or giraffe; well later I'll post on making the yarn hair for the basic doll. We have already made a pattern (pattern making), cut out our pieces and sewed the head to the torso (part 1), and embroidered the face of the doll (part 2).

Now we're ready to sew the arms and legs, stuff them, attach them to the body and finish our doll!
we'll add some yarn hair to this doll in the next post
For the limbs of the basic doll above, you fold over your fabric (RST) so that it is doubled. Then trace the limbs on the folded fabric with a disappearing marker (I used pencil for the pictures here). Then I pin the fabric together and sew with a small stitch (1.6 on my machine) directly on the traced lines, leaving the base of the limbs unsewn so I can turn and stuff them later.
trace limb pattern on folded fabric

pin the fabric together

sew directly on traced lines with a tight stitch (I used 1.6 length)

limbs sewn
For the giraffe, we have to sew the felt (for the hooves) to the fabric for the rest of the limbs. I cut an 11 x 11 inch piece of cotton fabric for the arms/legs, and 2 pieces of felt measuring 2.75 x 11 inches. Then I pin the felt pieces to the fabric (one on top and one on bottom of arm fabric) like the picture below. I sew the felt on to the fabric where I've pinned, using 1/4 inch seam. Then press the seam and fold the fabric over in half (RST). Now I can trace my limb pattern pieces directly on the fabric and sew along my traced lines, leaving the base unsewn to turn and stuff.
for giraffe, pin felt strips to fabric to create the limb fabric
press the seams

fold the fabric in half, right sides together

line up the seams
trace pattern pieces on fabric

pin the fabric together

sew on traced lines, leaving base unsewn

sewn on the traced lines

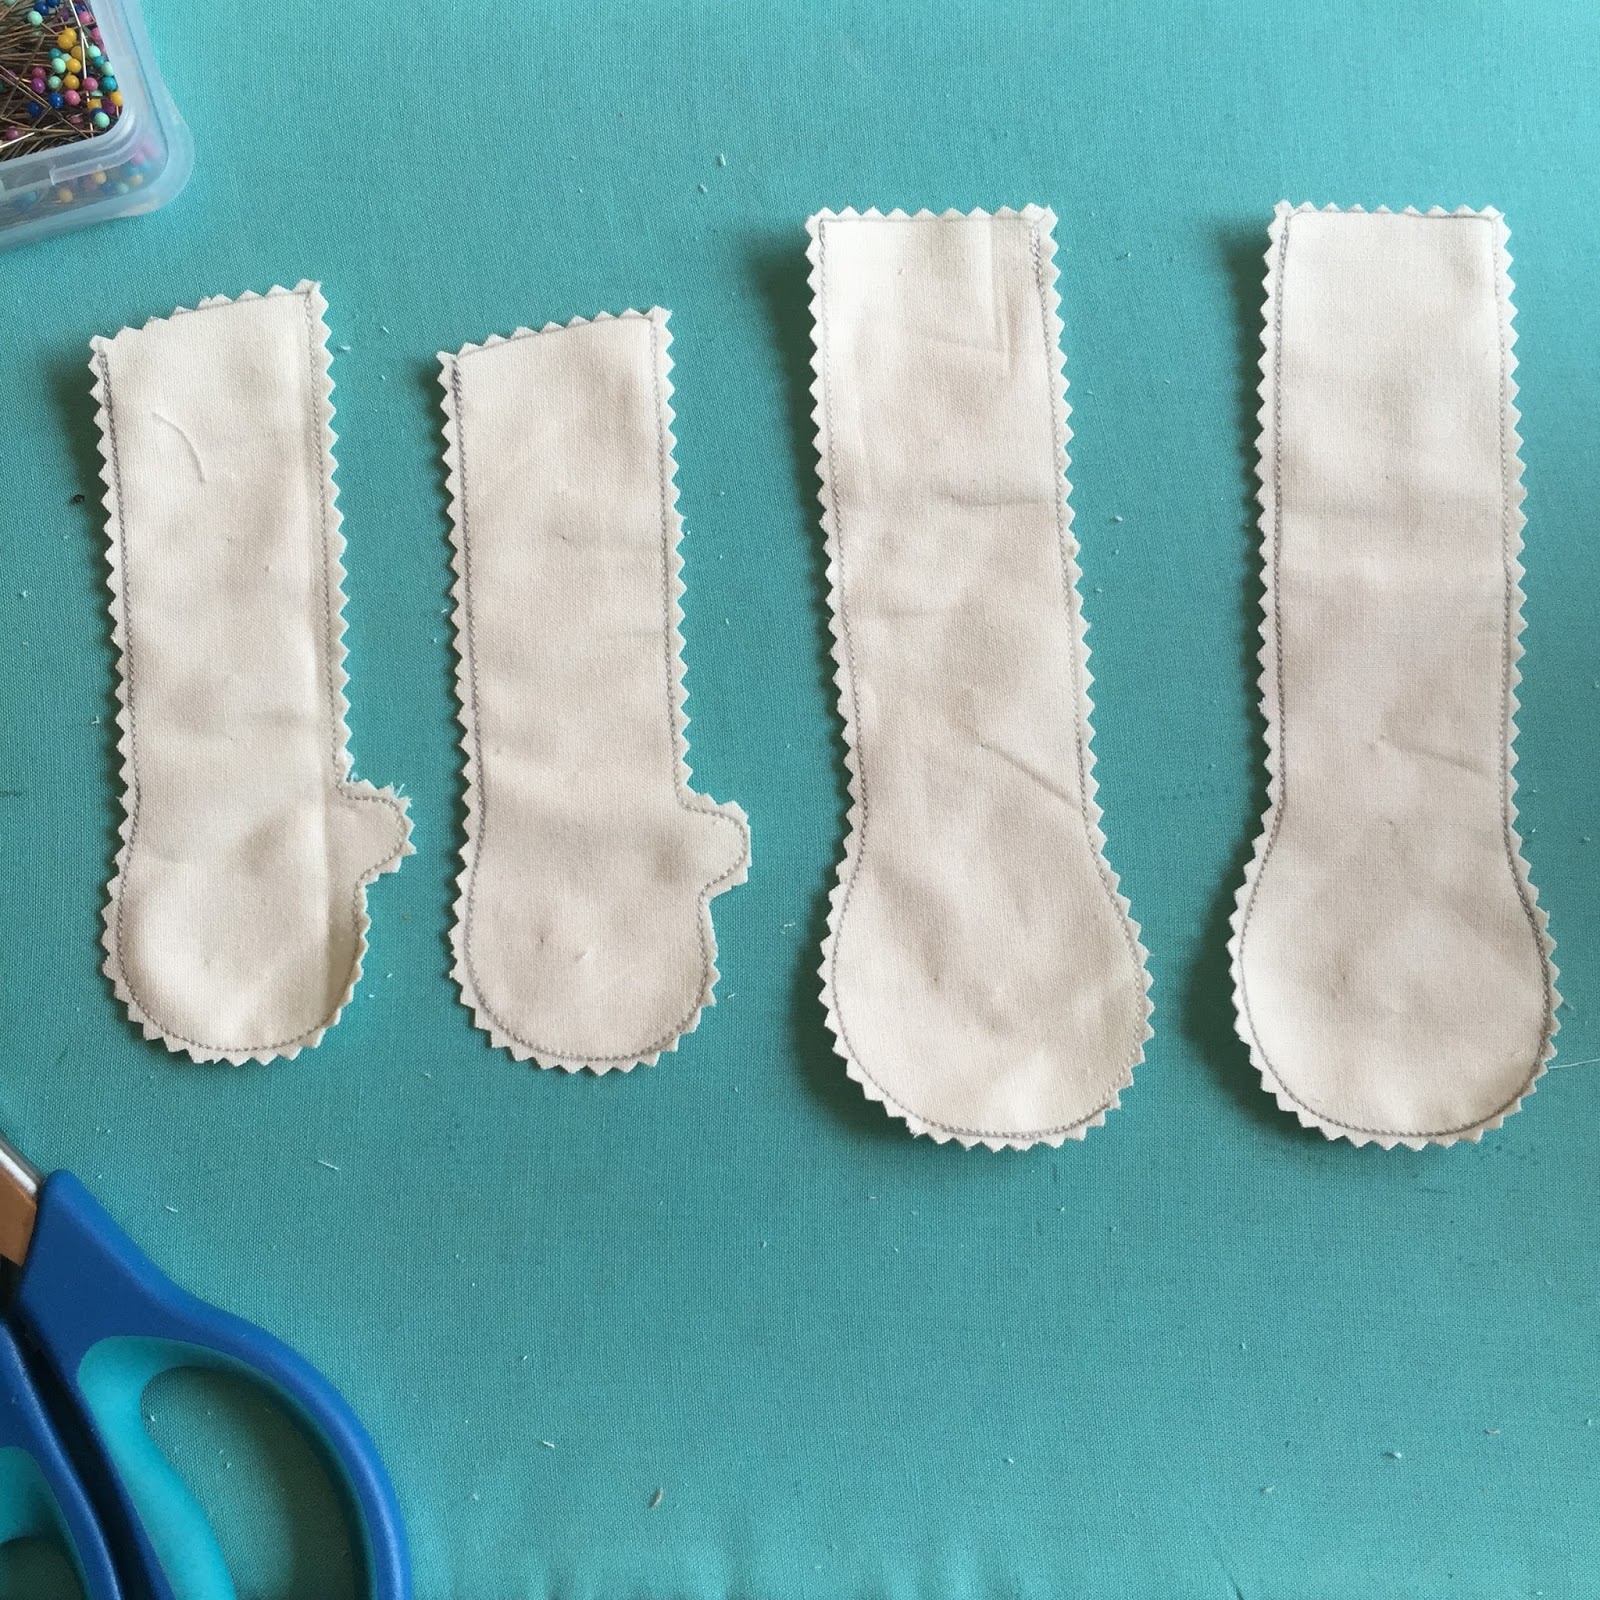
cut out with pinking shears

Turn them right side out

After the limbs are sewn, cut them out with pinking shears, or make little notches close to the stitches on the curves. Then turn and press them with an iron. I stuff them firmly then with small tufts of poly-fil stuffing, leaving about an inch unstuffed at the base. Leaving the base unstuffed will make it easier to sew it on with the machine later.
leave about 1/8th inch seam allowance and cut out notches with pinking shears

turn the limbs right-side-out and press them with iron

stuff the limbs with stuffing, leaving an inch unstuffed at base
With the limbs stuffed, we can now add them to the body. We're almost done. Exciting! Attach/pin the limbs to the front of your doll (with limbs going towards center of body) as shown in the photo below, then baste stitch them on to the front of the doll. I start with the arms and then attach the legs.
pin and sew the arms on to the front of body with the limbs toward the center of the doll

attach the legs in the same manner, with the legs going up towards the head
Here are some pics of the same procedure for the giraffe doll (attach the horns and ears to the head as shown):


With the limbs now attached to the doll, we can sew the back of the body on. On the wrong side of the back piece of the doll, I like to draw my seam allowance (1/4 inch) all the way around. This helps me sew more accurately around the curves. It comes in handy when sewing the more curvy giraffe pattern.
optional: draw a line for your seam allowance on the back of the doll piece. I leave a little more than 1/4 inch on the bottom where the legs will be attached. 
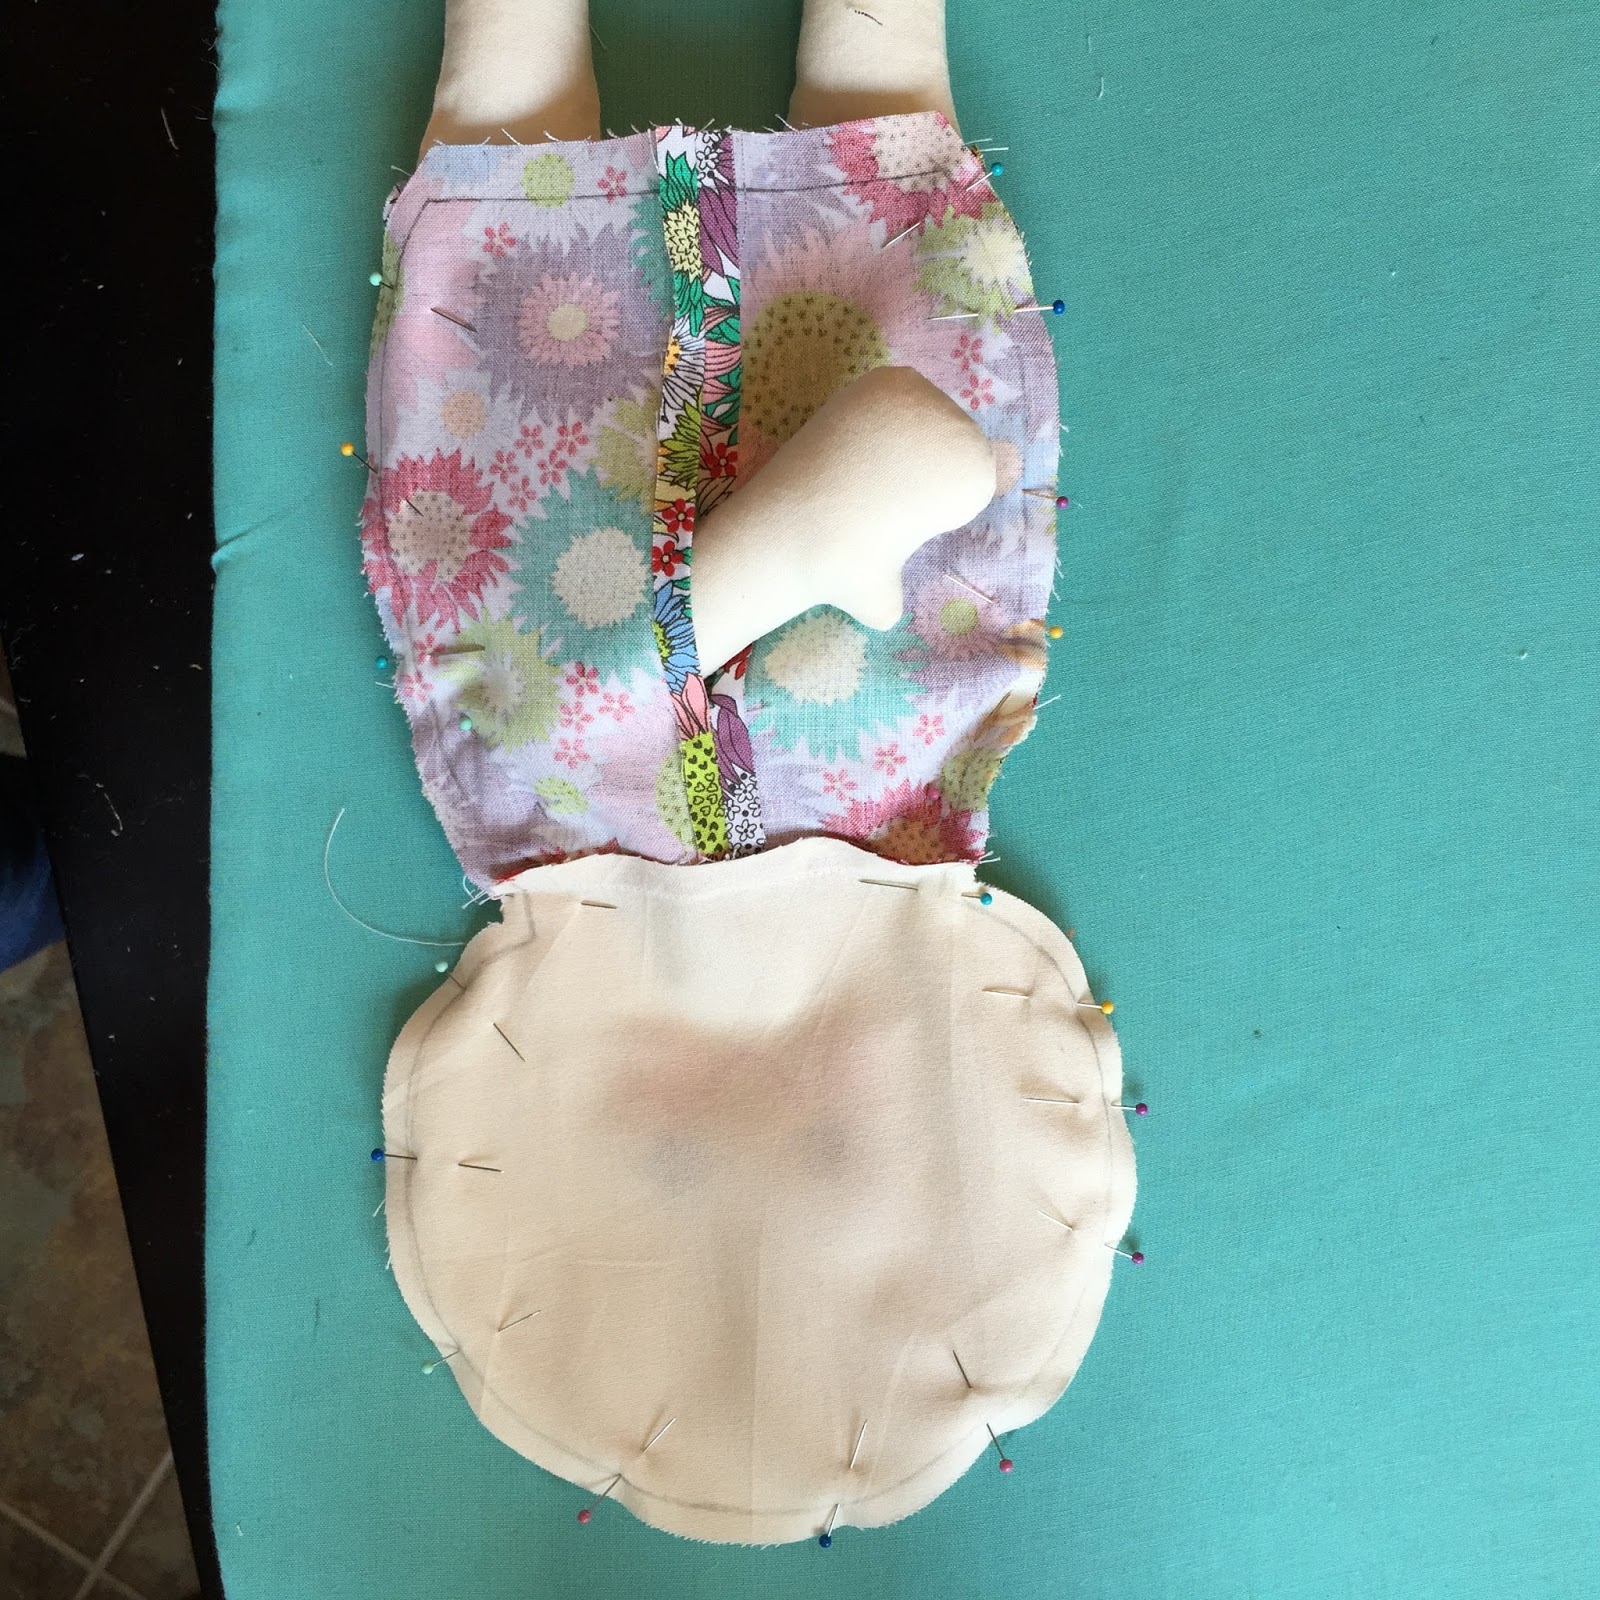
Now I pin the back of the body to the front (right sides together). I leave the legs out at first and don't sew that portion yet. If I pinned it all together at once, the fabric would get all distorted and would be difficult to sew. I stick one of the arms out of the little hole in the back to make the fabric lay more flat to sew. Then I sew from the base (near the legs) on one side--with my stitch length at 1.6--to the base of the other side near the other leg. I sew over again the portions where the arms are attached to make sure they are attached securely.
pin the front and back of doll together (RST) as shown
After that part is sewn, I stuff the arm back in the body, and fold the legs up inside the body (one is sticking out the back hole) and sew the base of the doll. I sew over the legs again as I did with the arms to make sure the legs stay securely attached.
sew the legs up inside the doll
BEFORE turning the doll right side out, it is very important to clip the curves and take a notch out at the neck close to the stitch so that it will lay right once it is right-side-out. I use sharp scissors for the triangle portion taken out of the neck, and use the pinking shears on the rest.
cut a triangle out of the seam at the neck. Use pinking shears to clip close to the stitches on rest of doll (see picture above).

With the curves notched and clipped, you can turn your doll right-side-out through the hole in the back. Ta-da!
doll turned right-side out
Now using tufts of poly-fil, stuff the head of the doll fairly firmly and work your way down to stuffing the body. Once the body is stuffed as firm as you'd like, you will hand sew the back of the doll using an "invisible" stitch (also known as the ladder stitch). This helps the seam lay nice and flat and it's hard to tell that you've hand-sewn the back shut. You can use a whip-stitch if you'd like, but that will show more. 
Pin the fabric together where you will hand stitch

the back all sewn up using the invisible ladder stitch
For the basic doll, you are all done (except the hair)!

For the giraffe, you will hand-sew in the tail (see how to make the pom-pom tail in this earlier post: pom pom tail for giraffe) at the base of the hole you are sewing up in the back. Now add a small amount of stuffing to the nose and hand stitch that up. And the giraffe is done!!
pom pom sewn in the base of the hole at the back of doll
Congratulations! Now go make another or two. Or experiment with making more patterns of your own. It's fun.
Ta da!