Showing posts with label free pattern. Show all posts

Monday, November 2, 2015

Emoji Pillow Tutorial with FREE pattern: sewing is optional

Every Wednesday, I get together with the youth/girls from my church and we do activities. This week, they want to make emoji pillows. Fun, right?

They each have a different emoji in mind, which meant I made a few different patterns, one for each girl. We will make an alien, a koala, heart eyes, kissy winky face, and stressed (?) face to name a few. Then tomorrow we will get together, sew them up and stuff them. And the girls will go home with their own plushie emoji pillow. 

Since pillows are easy to make, and fun for all ages, I decided to post the pattern for a simple winky-face emoji pillow here, with a quick tutorial on how to put it together. This would make a fun project for a beginning sewer, or anyone really. 

I might have made a poop emoji pillow that I slipped to my sister's husband to place underneath her pillow once......my sister and I send each other that emoji ALL THE TIME. We might be a little on the immature side. Poop. Giggle giggle. It's a happy pile of poop. Snicker....

The pattern I am posting here for free is the winky-face emoji. It will make a 14-inch diameter soft pillow: the perfect size to sit atop a bed or to accessorize a chair. 
This pattern will print on 6 pages of 8.5 x 11-inch paper

You will need:
  • 1/2 yard yellow fleece
  • yellow all-purpose sewing thread, thread to match felt
  • brown, black, or dark gray felt (I use wool-blend felt) for eyes, eyebrows, and mouth **if you don't want to use felt, you can applique cotton fabric onto the fleece instead using applique adhesive paper and then use zig-zag stitch in matching thread around the border of each appliqued piece. 
  • typical sewing notions: pins, scissors **if you don't own a sewing machine, you can also glue the pillow...that will work too. I'll explain that in the tutorial. 

Download the pattern HERE. 

It will print in 6 pages. Each page has cross-marks in the corners for you to line up and tape together. 

If you prefer the pdf file not be broken up, leave a comment below and I will email you the unbroken pdf file. If you open it in Adobe Acrobat, print it under the option "poster" and it will print it for you on separate pages. 

The pattern has 1/2 inch seam allowance. 


Let's Get Started!


1. Pin your pattern pieces (or trace around them) onto your fabrics as outlined in the pattern. You will cut 2 yellow fleece circles, a left oval eye out of felt, a right "winky" eye, the eyebrows, and the mouth all out of felt as well. 

I used all dark brown felt for my pillow

The nice thing about felt is that since it's a pressed fabric, it won't fray, especially if you use really sharp scissors (I use small embroidery scissors). So you don't need to worry about the "unfinished" edges of the felt. They can stay that way. 

2. Place your facial features onto one of the yellow circles (on the "right" side of the fabric). Align them using the pattern as a guide. You can pin in place, or do like me and use some washable glue stick (shhhh...don't tell your mother) to hold the felt pieces in place once you have them where you like. 

Then with matching thread, edge stitch around each felt piece. Go slow around some of those curves if you need to. The eyebrows can be a bit tricky. 

**NO-SEW Method: Alternatively, get yourself some E6000 glue and with small amounts, glue the felt pieces down on the fleece. You may want to use a toothpick to spread the glue evenly over the felt pieces. 

3. Take your second circle of fleece and place it on top of your first piece (now with the face on it), with right sides of the fabrics together. Pin the fabrics in place. Since fleece can slip easily when sewing, I err on the side of using more pins than less.


Now starting at the top of the head, begin sewing (with 1/2 inch seam allowance) around the curve of the circle, sewing the two fleece fabrics together. When you get back up to the top, make sure you stop and leave about a 3-4 inch gap in which to turn the pillow. 

Before you turn the pillow right-side out through the gap you left, make sure you clip the seam allowance so that the pillow lays nicely. You can do this using pinking shears, or with sharp scissors, by cutting lines perpendicular to your sewn line close to (but not through) the stitches. 
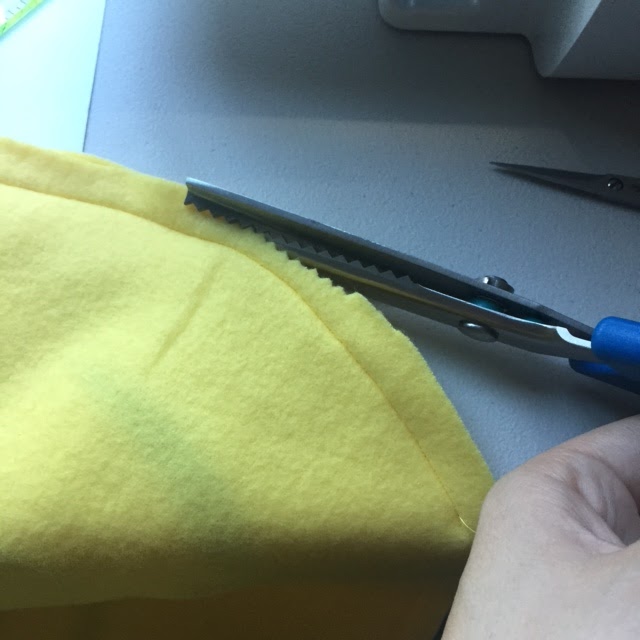
using pinking shears to trim seam allowance

if you don't have pinking shears, you can trim the seam with scissors and then make small slits as shown

**NO-SEW Method: place the fleece circles right sides together as mentioned above, but instead of sewing along the edge, glue the pieces together along the very edge (toothpicks will come in handy here again), leaving 3-4 inches unglued to turn and stuff after the glue has dried. Allow glue to dry. 

4. Turn, iron, and stuff! Through the gap you left un-sewn (or un-glued), turn your pillow right-side out and press it with an iron. Since you are ironing polyester and acrylic material, you DO NOT want the iron to be too hot, or you will melt your materials. Have your iron on the lowest setting, and without steam. Pressing the area where the gap is (with the fabric folded as if it had been sewn) will help you in sewing up the pillow by hand to close it.
I don't trim the seam where the gap is so that I have more fabric there to work with when I hand-sew pillow shut

pressing the fabric after pillow has been turned right-side-out


Using poly-fil stuffing, stuff small wads into the pillow through the hole/gap until you get your desired firmness. Pin the top closed and hand-sew--through the fold you pressed earlier-- (using a ladder stitch looks best, but a whipstich will also get the job done) your opening closed. You are done!! See?! Easy peasy!
Pin the opening closed after stuffing, and hand sew it shut


For those using glue, you would just glue your opening shut. That's right; I said glue it shut!

Using this pattern as a guide, you can make pattern pieces for other emoji's now, too. Surround yourself with emoji pillows. Make your own feelings chart using emoji's. Put a poop emoji in your sister's bed. The sky's the limit!

Have fun making pillows! I think they'd make a fun light-hearted Christmas gift. 

**UPDATE: Here are the other pillows we made:


Wednesday, July 1, 2015

putting your ragdoll/softie together part 3: sewing limbs, stuffing and finishing

This post has been a long-time coming. My apologies! Today we are going to finish up making our rag dolls or giraffe; well later I'll post on making the yarn hair for the basic doll. We have already made a pattern (pattern making), cut out our pieces and sewed the head to the torso (part 1), and embroidered the face of the doll (part 2).

Now we're ready to sew the arms and legs, stuff them, attach them to the body and finish our doll!
we'll add some yarn hair to this doll in the next post
For the limbs of the basic doll above, you fold over your fabric (RST) so that it is doubled. Then trace the limbs on the folded fabric with a disappearing marker (I used pencil for the pictures here). Then I pin the fabric together and sew with a small stitch (1.6 on my machine) directly on the traced lines, leaving the base of the limbs unsewn so I can turn and stuff them later.
trace limb pattern on folded fabric

pin the fabric together

sew directly on traced lines with a tight stitch (I used 1.6 length)

limbs sewn
For the giraffe, we have to sew the felt (for the hooves) to the fabric for the rest of the limbs. I cut an 11 x 11 inch piece of cotton fabric for the arms/legs, and 2 pieces of felt measuring 2.75 x 11 inches. Then I pin the felt pieces to the fabric (one on top and one on bottom of arm fabric) like the picture below. I sew the felt on to the fabric where I've pinned, using 1/4 inch seam. Then press the seam and fold the fabric over in half (RST). Now I can trace my limb pattern pieces directly on the fabric and sew along my traced lines, leaving the base unsewn to turn and stuff.
for giraffe, pin felt strips to fabric to create the limb fabric
press the seams

fold the fabric in half, right sides together

line up the seams
trace pattern pieces on fabric

pin the fabric together

sew on traced lines, leaving base unsewn

sewn on the traced lines

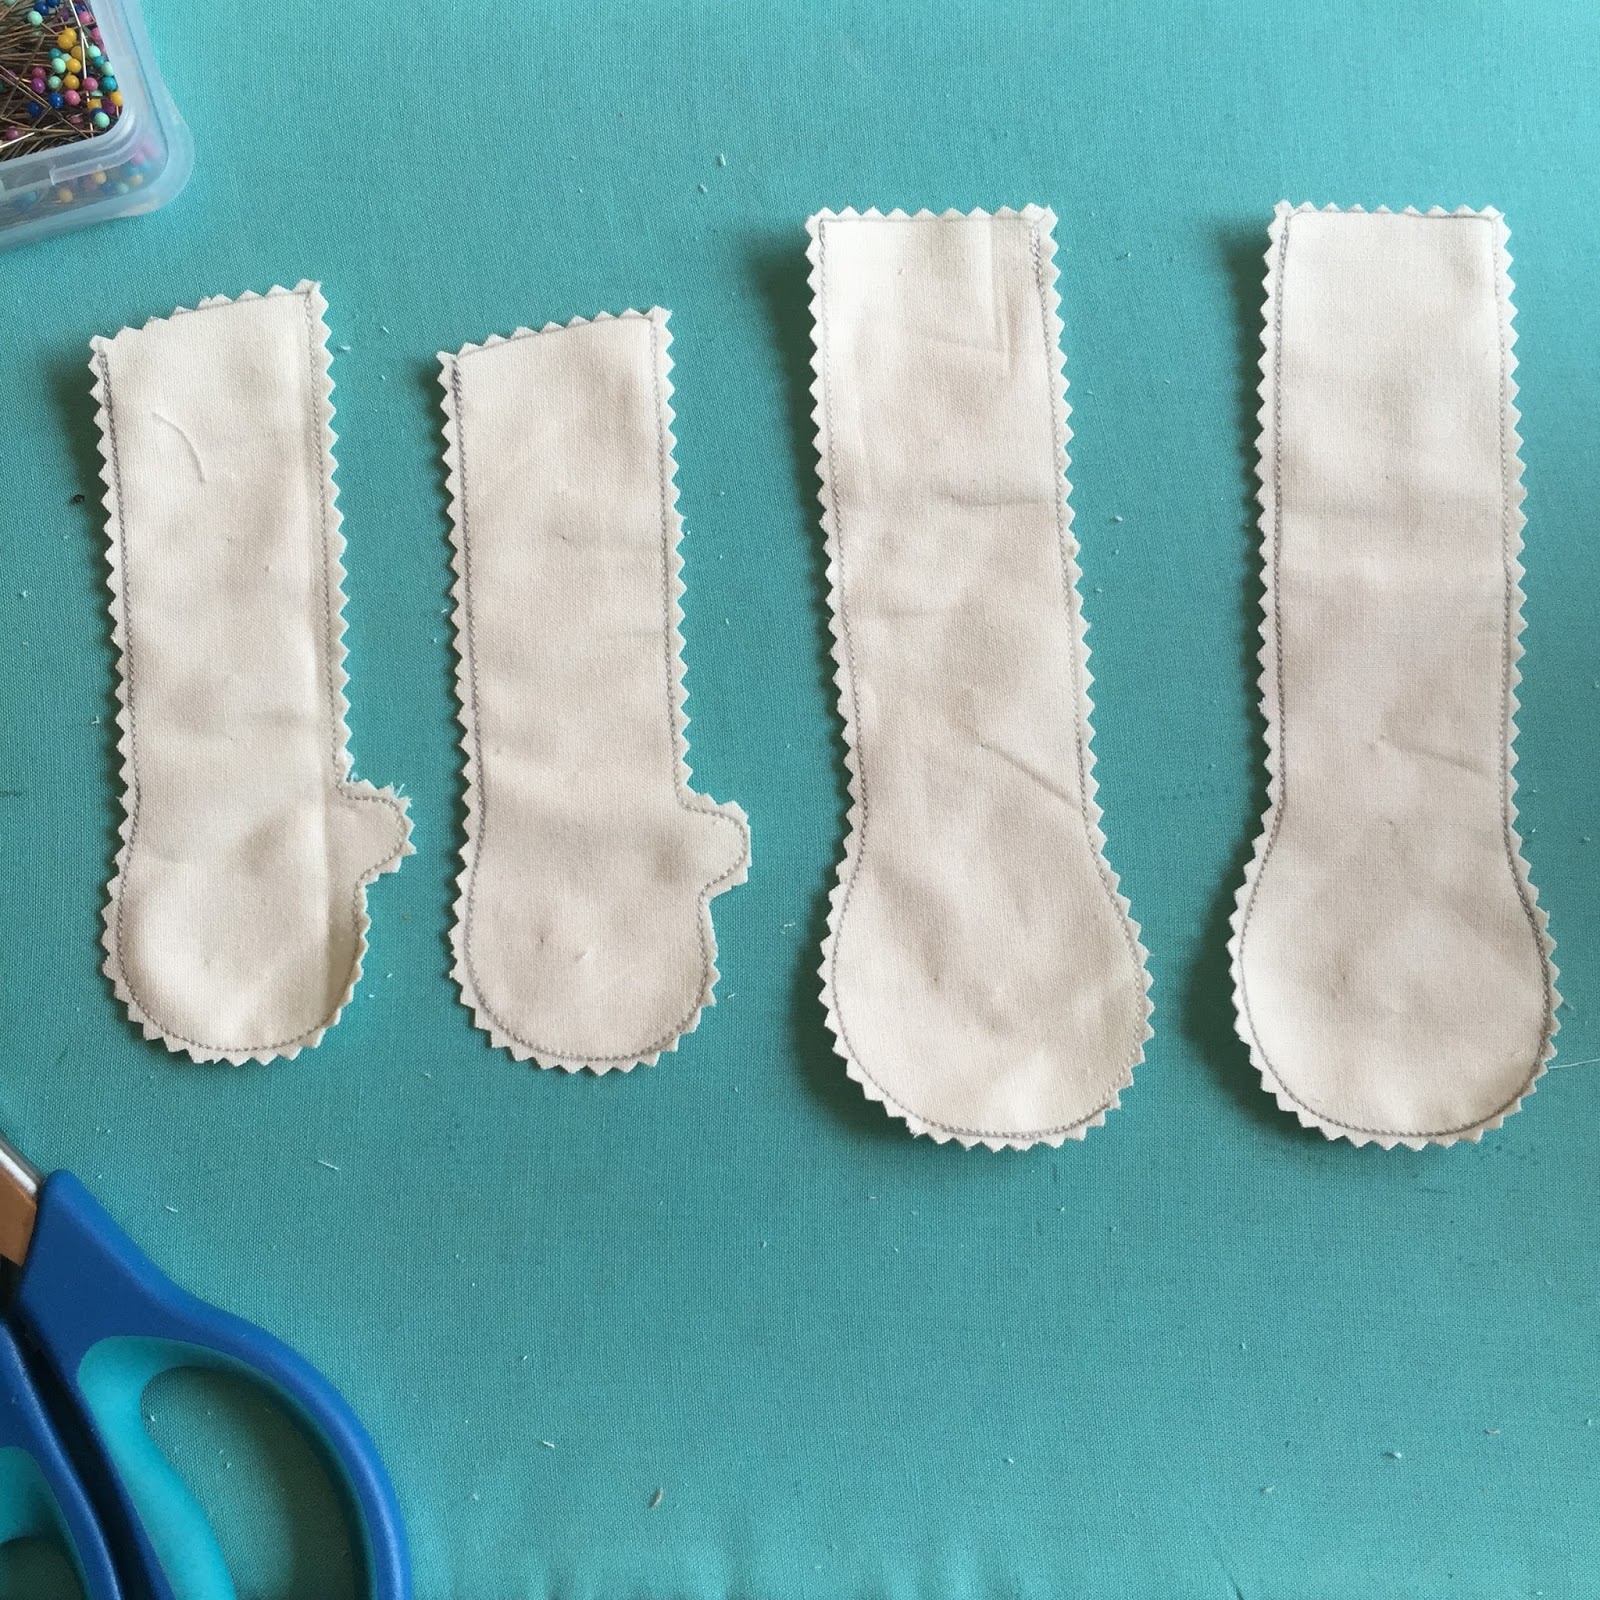
cut out with pinking shears

Turn them right side out

After the limbs are sewn, cut them out with pinking shears, or make little notches close to the stitches on the curves. Then turn and press them with an iron. I stuff them firmly then with small tufts of poly-fil stuffing, leaving about an inch unstuffed at the base. Leaving the base unstuffed will make it easier to sew it on with the machine later.
leave about 1/8th inch seam allowance and cut out notches with pinking shears

turn the limbs right-side-out and press them with iron

stuff the limbs with stuffing, leaving an inch unstuffed at base
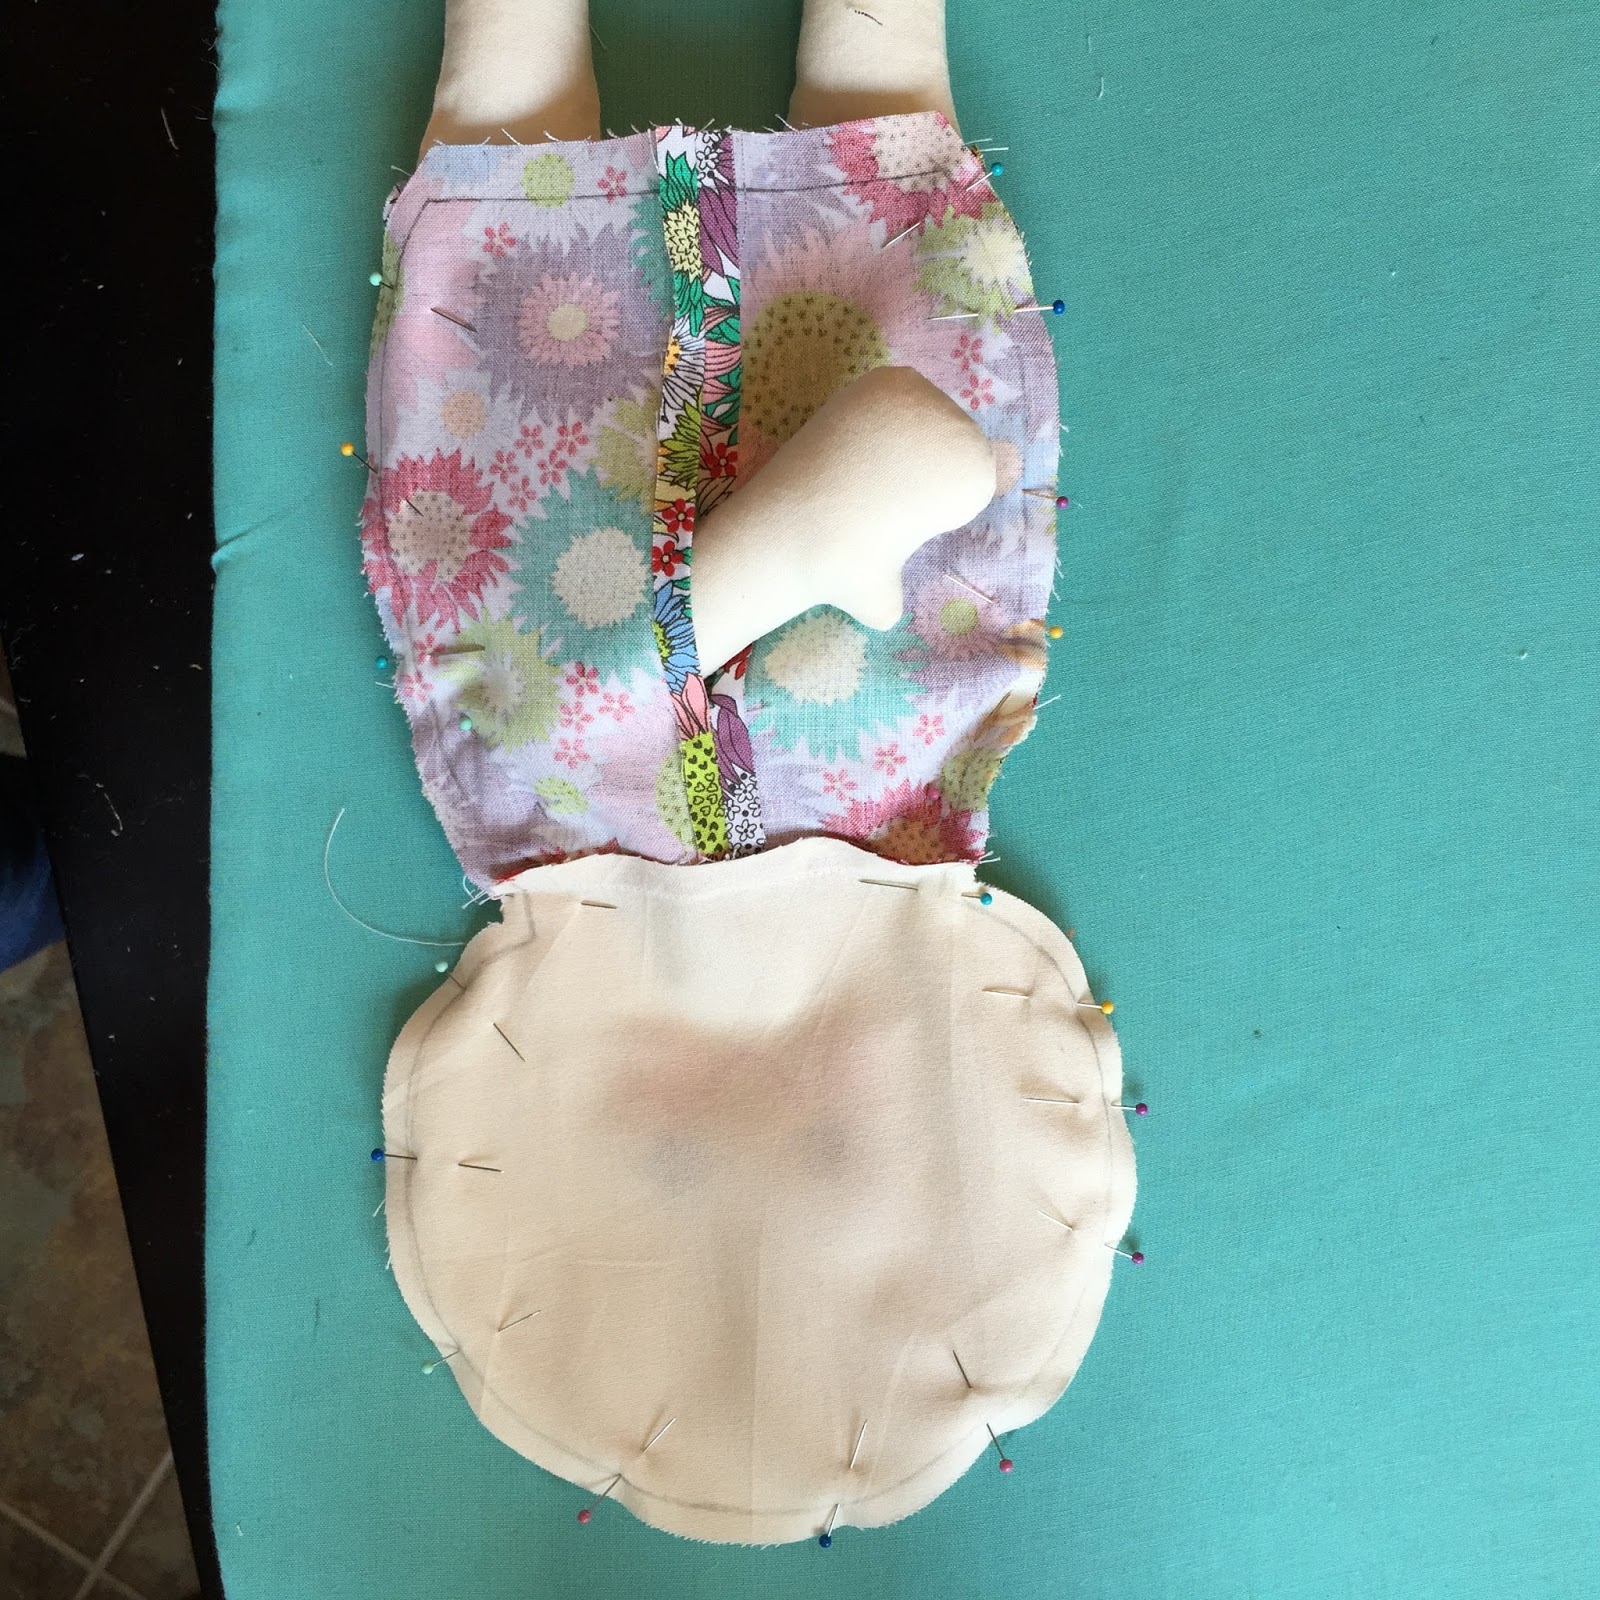
With the limbs stuffed, we can now add them to the body. We're almost done. Exciting! Attach/pin the limbs to the front of your doll (with limbs going towards center of body) as shown in the photo below, then baste stitch them on to the front of the doll. I start with the arms and then attach the legs.
pin and sew the arms on to the front of body with the limbs toward the center of the doll

attach the legs in the same manner, with the legs going up towards the head
Here are some pics of the same procedure for the giraffe doll (attach the horns and ears to the head as shown):


With the limbs now attached to the doll, we can sew the back of the body on. On the wrong side of the back piece of the doll, I like to draw my seam allowance (1/4 inch) all the way around. This helps me sew more accurately around the curves. It comes in handy when sewing the more curvy giraffe pattern.
optional: draw a line for your seam allowance on the back of the doll piece. I leave a little more than 1/4 inch on the bottom where the legs will be attached. 
Now I pin the back of the body to the front (right sides together). I leave the legs out at first and don't sew that portion yet. If I pinned it all together at once, the fabric would get all distorted and would be difficult to sew. I stick one of the arms out of the little hole in the back to make the fabric lay more flat to sew. Then I sew from the base (near the legs) on one side--with my stitch length at 1.6--to the base of the other side near the other leg. I sew over again the portions where the arms are attached to make sure they are attached securely.
pin the front and back of doll together (RST) as shown
After that part is sewn, I stuff the arm back in the body, and fold the legs up inside the body (one is sticking out the back hole) and sew the base of the doll. I sew over the legs again as I did with the arms to make sure the legs stay securely attached.
sew the legs up inside the doll
BEFORE turning the doll right side out, it is very important to clip the curves and take a notch out at the neck close to the stitch so that it will lay right once it is right-side-out. I use sharp scissors for the triangle portion taken out of the neck, and use the pinking shears on the rest.
cut a triangle out of the seam at the neck. Use pinking shears to clip close to the stitches on rest of doll (see picture above).

With the curves notched and clipped, you can turn your doll right-side-out through the hole in the back. Ta-da!
doll turned right-side out
Now using tufts of poly-fil, stuff the head of the doll fairly firmly and work your way down to stuffing the body. Once the body is stuffed as firm as you'd like, you will hand sew the back of the doll using an "invisible" stitch (also known as the ladder stitch). This helps the seam lay nice and flat and it's hard to tell that you've hand-sewn the back shut. You can use a whip-stitch if you'd like, but that will show more. 
Pin the fabric together where you will hand stitch

the back all sewn up using the invisible ladder stitch
For the basic doll, you are all done (except the hair)!

For the giraffe, you will hand-sew in the tail (see how to make the pom-pom tail in this earlier post: pom pom tail for giraffe) at the base of the hole you are sewing up in the back. Now add a small amount of stuffing to the nose and hand stitch that up. And the giraffe is done!!
pom pom sewn in the base of the hole at the back of doll
Congratulations! Now go make another or two. Or experiment with making more patterns of your own. It's fun.
Ta da!