This post has been a long-time coming. My apologies! Today we are going to finish up making our rag dolls or giraffe; well later I'll post on making the yarn hair for the basic doll. We have already made a pattern (
pattern making), cut out our pieces and sewed the head to the torso (
part 1), and embroidered the face of the doll (
part 2).
Now we're ready to sew the arms and legs, stuff them, attach them to the body and finish our doll!
 |
| we'll add some yarn hair to this doll in the next post |
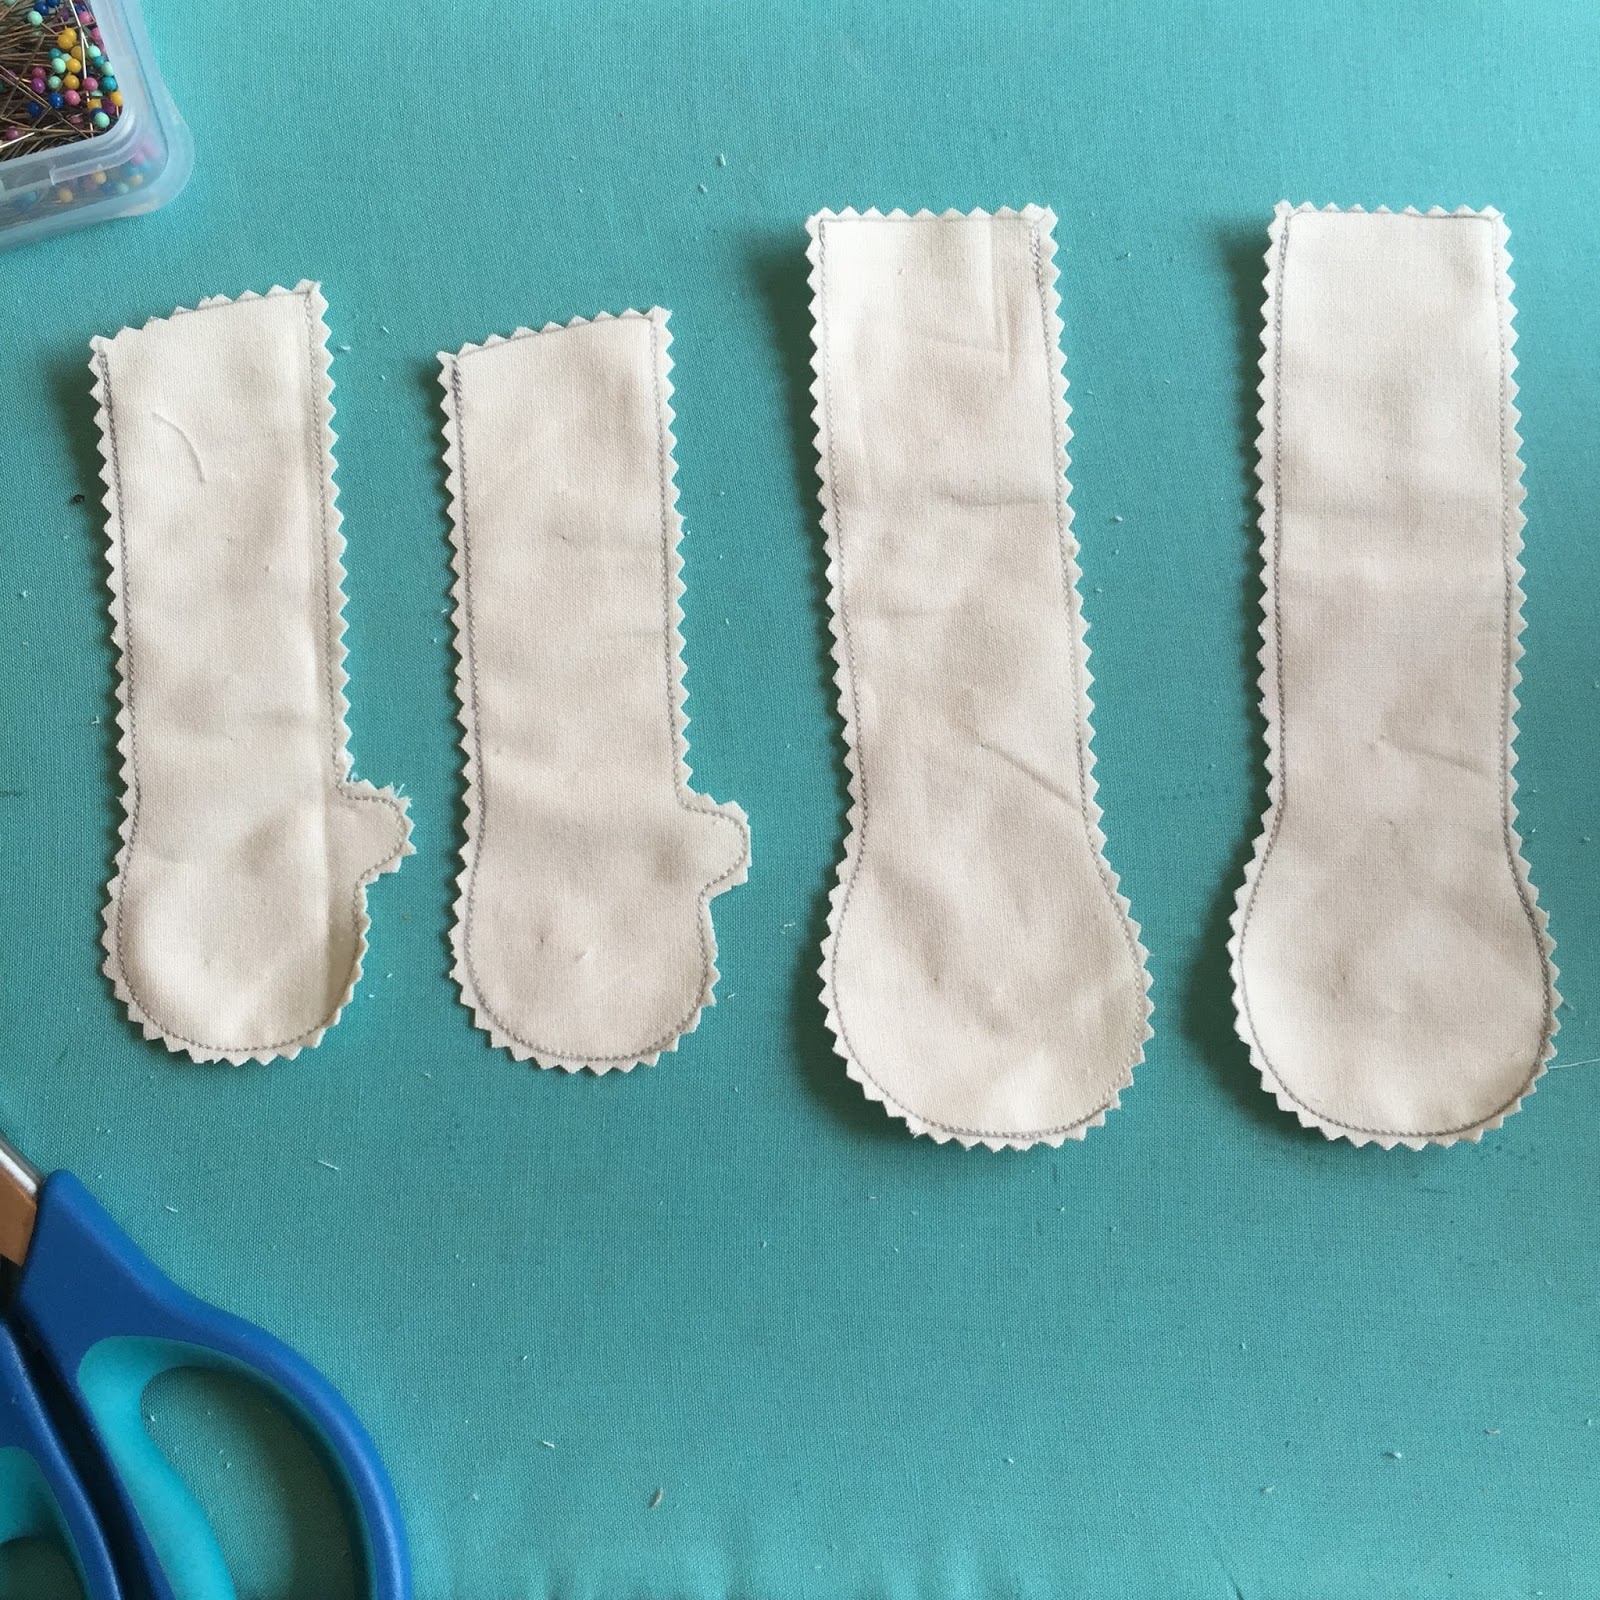
For the limbs of the basic doll above, you fold over your fabric (RST) so that it is doubled. Then trace the limbs on the folded fabric with a disappearing marker (I used pencil for the pictures here). Then I pin the fabric together and sew with a small stitch (1.6 on my machine) directly on the traced lines, leaving the base of the limbs unsewn so I can turn and stuff them later.
 |
| trace limb pattern on folded fabric |
 |
| pin the fabric together |
 |
| sew directly on traced lines with a tight stitch (I used 1.6 length) |
 |
| limbs sewn |
For the giraffe, we have to sew the felt (for the hooves) to the fabric for the rest of the limbs. I cut an 11 x 11 inch piece of cotton fabric for the arms/legs, and 2 pieces of felt measuring 2.75 x 11 inches. Then I pin the felt pieces to the fabric (one on top and one on bottom of arm fabric) like the picture below. I sew the felt on to the fabric where I've pinned, using 1/4 inch seam. Then press the seam and fold the fabric over in half (RST). Now I can trace my limb pattern pieces directly on the fabric and sew along my traced lines, leaving the base unsewn to turn and stuff.
 |
| for giraffe, pin felt strips to fabric to create the limb fabric |
 |
| press the seams |
 |
| fold the fabric in half, right sides together |
 |
| line up the seams |
 |
| trace pattern pieces on fabric |
 |
| pin the fabric together |
 |
| sew on traced lines, leaving base unsewn |
 |
| sewn on the traced lines |
 |
| cut out with pinking shears |
 |
| Turn them right side out |
After the limbs are sewn, cut them out with pinking shears, or make little notches close to the stitches on the curves. Then turn and press them with an iron. I stuff them firmly then with small tufts of poly-fil stuffing, leaving about an inch unstuffed at the base. Leaving the base unstuffed will make it easier to sew it on with the machine later.
 |
| leave about 1/8th inch seam allowance and cut out notches with pinking shears |
 |
| turn the limbs right-side-out and press them with iron |
 |
| stuff the limbs with stuffing, leaving an inch unstuffed at base |
With the limbs stuffed, we can now add them to the body. We're almost done. Exciting! Attach/pin the limbs to the front of your doll (with limbs going towards center of body) as shown in the photo below, then baste stitch them on to the front of the doll. I start with the arms and then attach the legs.
 |
| pin and sew the arms on to the front of body with the limbs toward the center of the doll |
 |
| attach the legs in the same manner, with the legs going up towards the head |
Here are some pics of the same procedure for the giraffe doll (attach the horns and ears to the head as shown):


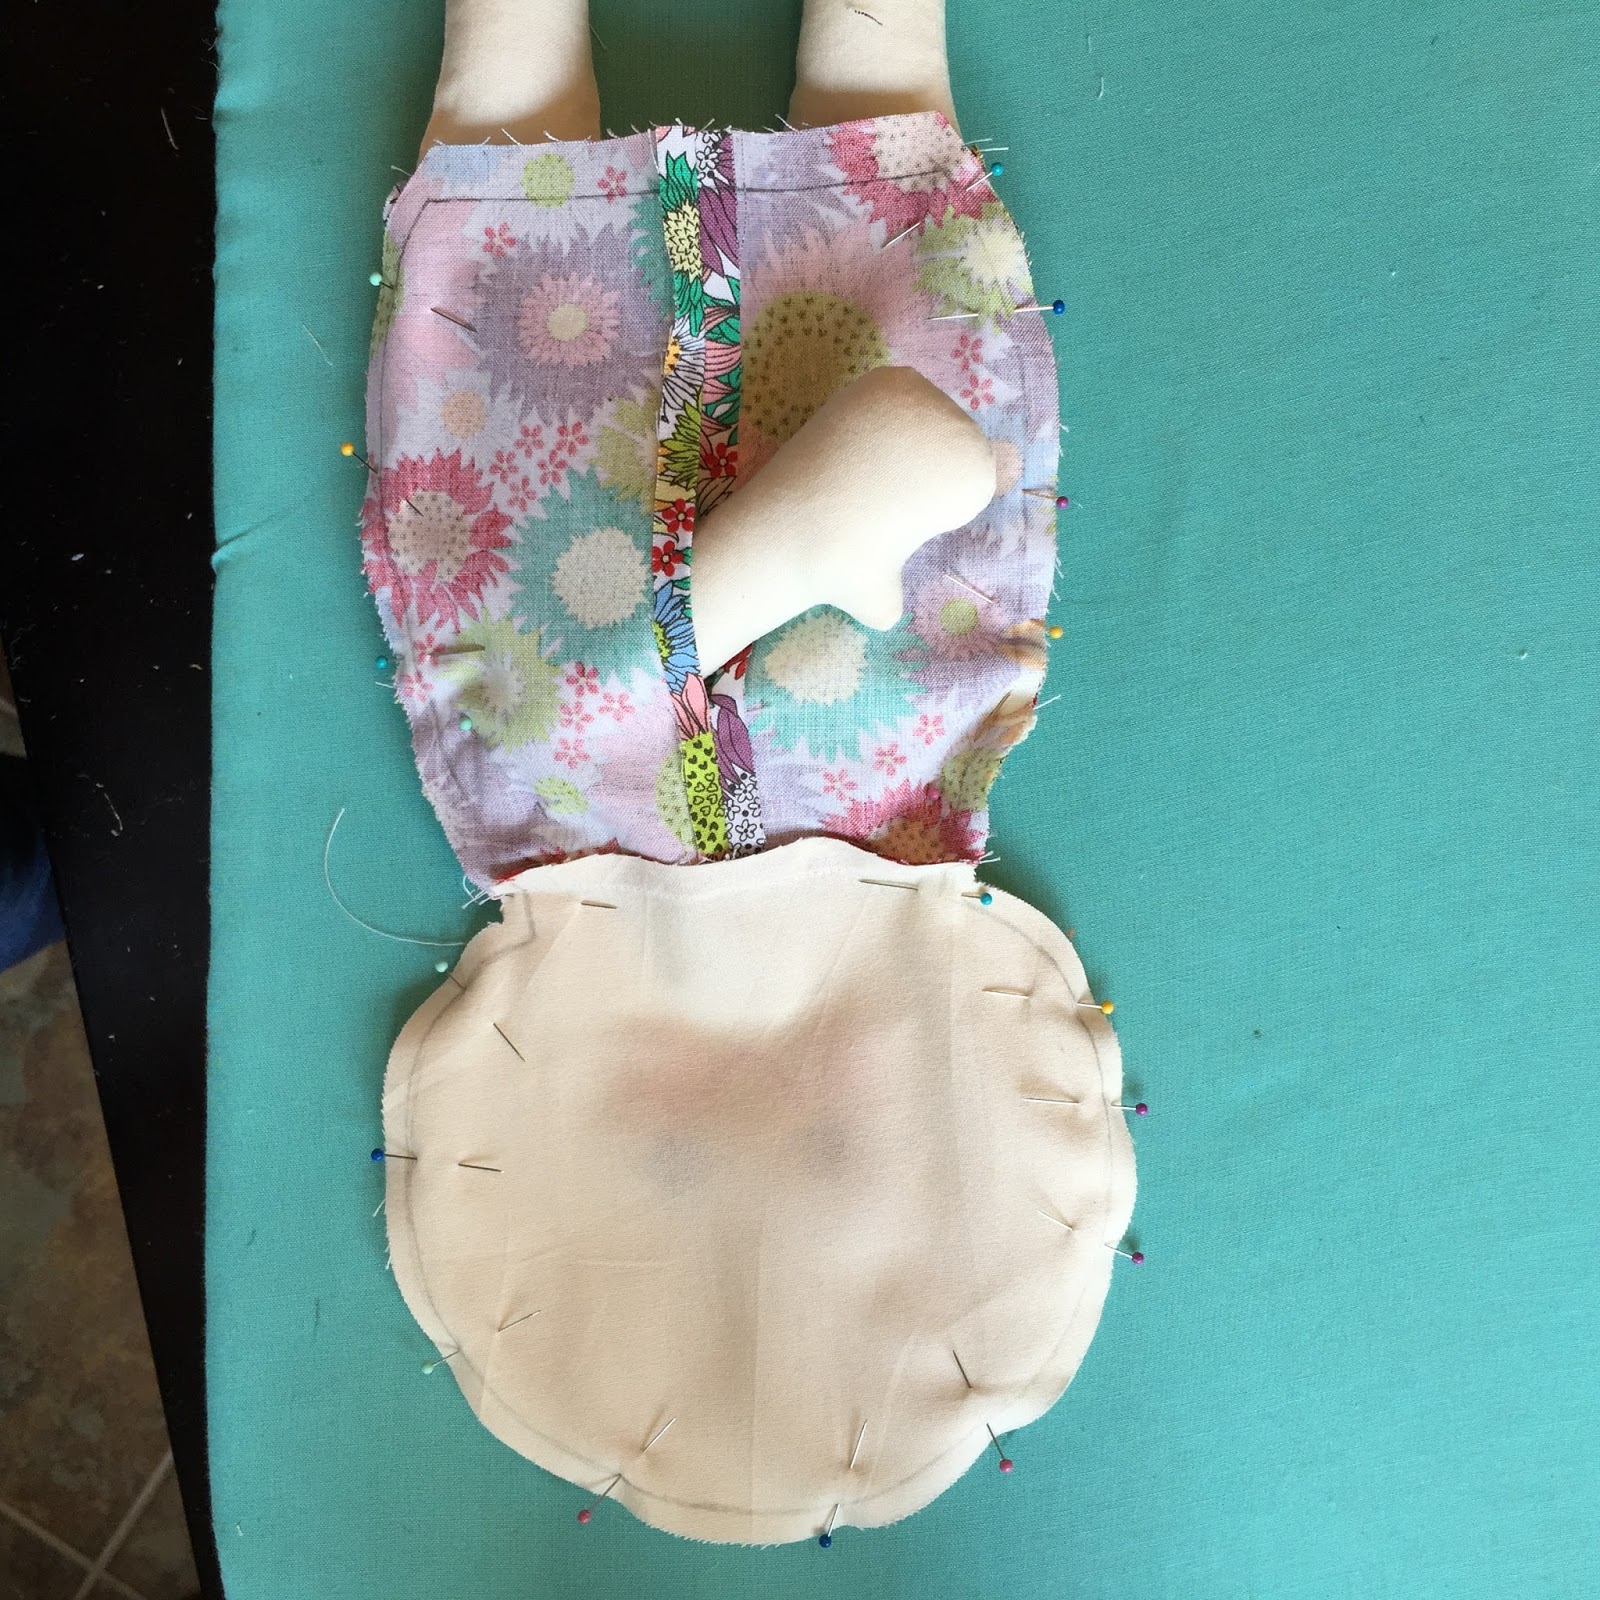
With the limbs now attached to the doll, we can sew the back of the body on. On the wrong side of the back piece of the doll, I like to draw my seam allowance (1/4 inch) all the way around. This helps me sew more accurately around the curves. It comes in handy when sewing the more curvy giraffe pattern.
 |
| optional: draw a line for your seam allowance on the back of the doll piece. I leave a little more than 1/4 inch on the bottom where the legs will be attached. |
Now I pin the back of the body to the front (right sides together). I leave the legs out at first and don't sew that portion yet. If I pinned it all together at once, the fabric would get all distorted and would be difficult to sew. I stick one of the arms out of the little hole in the back to make the fabric lay more flat to sew. Then I sew from the base (near the legs) on one side
--with my stitch length at 1.6--to the base of the other side near the other leg. I sew over again the portions where the arms are attached to make sure they are attached securely.
 |
| pin the front and back of doll together (RST) as shown |
After that part is sewn, I stuff the arm back in the body, and fold the legs up inside the body (one is sticking out the back hole) and sew the base of the doll. I sew over the legs again as I did with the arms to make sure the legs stay securely attached.
 |
| sew the legs up inside the doll |
BEFORE turning the doll right side out, it is very important to clip the curves and take a notch out at the neck close to the stitch so that it will lay right once it is right-side-out. I use sharp scissors for the triangle portion taken out of the neck, and use the pinking shears on the rest.
 |
| cut a triangle out of the seam at the neck. Use pinking shears to clip close to the stitches on rest of doll (see picture above). |
With the curves notched and clipped, you can turn your doll right-side-out through the hole in the back. Ta-da!
 |
| doll turned right-side out |
Now using tufts of poly-fil, stuff the head of the doll fairly firmly and work your way down to stuffing the body. Once the body is stuffed as firm as you'd like, you will hand sew the back of the doll using an "invisible" stitch (also known as the ladder stitch). This helps the seam lay nice and flat and it's hard to tell that you've hand-sewn the back shut. You can use a whip-stitch if you'd like, but that will show more.
 |
| Pin the fabric together where you will hand stitch |
 |
| the back all sewn up using the invisible ladder stitch |
For the basic doll, you are all done (except the hair)!
For the giraffe, you will hand-sew in the tail (see how to make the pom-pom tail in this earlier post:
pom pom tail for giraffe) at the base of the hole you are sewing up in the back. Now add a small amount of stuffing to the nose and hand stitch that up. And the giraffe is done!!
 |
| pom pom sewn in the base of the hole at the back of doll |
Congratulations! Now go make another or two. Or experiment with making more patterns of your own. It's fun.
 |
| Ta da! |


No comments:
Post a Comment