Thursday, April 28, 2016

Still all over the place..

I haven't been blogging so much. Because I've still got a lot of different irons in the fire when it comes to crafting/sewing, and I still am enamored by Instagram.

Now if you read my post here, you know that I'm a newbie to Instagram, and I am still in awe of it. I post a picture, and a fabric designer whose fabric I adore and whom (grammar police? I don't know to use "whom" or "who" here, so correct me if you know down in a comment..hee hee) I have never met can see it and like it and comment on it. Wha?? Amazing. It makes it a little more personal when I'm buying loads of their fabric. I'd still buy loads, but now I know what they look like. Ha ha.

And as a follow-up to the couple of sewing contests I joined, sadly I did not win. But alas, losing did not deter me from sewing. And the Bean got 4 dresses and a cute bag that she takes to preschool religiously.

Here are some pics of the dresses that she now can sport to church (and that I've already had to spray-and-wash because....she's 2):


She was such a good girl and really tried hard to do what I asked to take those pictures. 


I appliqued a little kite on the skirt of this one. The fabric line is called "Sommer" and is designed by Sarah Jane (and manufactured by Michael Miller Fabrics) in case anyone is interested.

Here is her second dress from the same fabric line:


I made that little belt too. It even has a vintage mother-of-pearl buckle that I ordered off of etsy. I really like this little retro style dress. Those mirrored swans are fun.

Then after the dress sewing contest, I started following all these quilt-people on Instagram, and so I joined a Block-of-the-Month group (Sarah Fielke's). I will be learning some new techniques with that group, so I am looking forward to that. Here is some needle-turn applique that I did on some of the blocks:


I am currently working on 3 quilts (intermittently), and I hope that at least one gets finished because I'm obviously all over the place!

And of course, life wouldn't be complete without some cookies. I wonder how many chocolate chips I go through a year? Or how much butter......Mmmmm....butter.

Alright, it's time to go pick up some kids and take them to piano lessons. Until next time!


Thursday, April 7, 2016

Chocolate Whole Grain Applesauce Muffins


For those of you who know me, you know that I have absolutely no problem whatsoever with eating a brownie or a cookie or a piece of cake for breakfast if I happen to have one of those available to me in the morning. However, sometimes that leaves me not feeling the greatest physically. Not because cookies and brownies with a glass of milk are bad, but because I tend to be a victim of convenience, a lover of baked goods and sugar, and well...lazy. So if I made brownies for dessert last night, there's a good chance that's what I'm having for breakfast too. Because it's there. And when I'm hungry, one brownie with milk doesn't satisfy, so I usually have a couple...and then sugar coma.


Well, what if you want some chocolate, but some added nutrition too? Well, this recipe actually came to fruition because the Bean requested cupcakes for breakfast. And well, I might be able to rationalize that, but this mommy wasn't gonna make cupcakes for breakfast for her 2-year old. So I adapted the pumpkin oatmeal recipe from this past post here.

Whole wheat flour?
Check.

Whole rolled oats?
Check.

Protein from the milk, eggs, and whole grains?
Check!

Fiber?
Check!

Applesauce for vitamin C?
Check!

Still relatively low in fat?
Check!!

Chocolate for breakfast?
Double check!

So if you're like me, and you want to feel better about eating your desser...er whole grain breakfast, well....you're welcome ;)
Yes, I put chocolate on a new quilt top! Eek

Whole-Grain Chocolate Oatmeal Applesauce Muffins

yields 24 muffins

2 cups whole oats
1 cup milk or buttermilk
1 cup applesauce (I use no sugar added)

2 eggs
1 cup dark brown sugar
1/3 cup vegetable oil
1 Tbsp. vanilla extract

1 3/4 cups white whole wheat flour
1/2 cup Dutch-processed cocoa powder
1 1/2 tsp. baking soda
1/2 tsp. baking powder
1 tsp. salt

Mini semi-sweet chocolate chips to taste (or 1 cup)


1. Pre-heat oven to 350 degrees Fahrenheit. Line muffin tins with cupcake liners or parchment liners. Meanwhile, thoroughly mix oats, milk or buttermilk, and applesauce together in large bowl. Allow the oats to sit for 15 minutes to absorb some of the liquid.

2. In a separate bowl, beat the eggs, sugar, vanilla and vegetable oil until well mixed, about 1 minute.

3. In a third bowl, sift together the white whole wheat flour, cocoa powder baking soda, and salt.

4. After the oats have soaked in the applesauce/milk mixture, add the egg/sugar/oil mixture and mix until combined. Add the flour mixture to the rest and stir together until the ingredients are incorporated. Mix in some mini (or regular) chocolate chips

5. Fill each muffin cup 2/3 full. Place in oven for 18-20 minutes, or until a toothpick comes out clean. Allow to cool in pan for five minutes before removing the muffins to a wire rack. Enjoy!


Do yourself a favor, and keep an eye on any small children while they consume these.....


And what did the 2-year old think? Well...after gobbling a couple of them up, she said, "Mommy, let's go to Disneyland now." Oh, the possibilities are endless when you're 2 and your mom makes you "cupcakes" for breakfast! Ha ha ha.


Thursday, March 10, 2016

I'm an All-over-the-place Crafter

I blame Instagram. And Pinterest. Now as usual, I'm late to the party. I always am. Instagram has been around forever, but it's only within the last few weeks that I've been using it. 

Like when iPods first came out, I stated: "That's dumb. Who needs to carry all their music around with them wherever they go?" Ahem...sooooo...yeah, look what iPods spurred on. It took me a few years after that before I finally succumbed and bought my iPod nano. I was later than my mother to that party. And yeah, I saw the use for it eventually. Now we're on to many iGadgets later.

I was late to the Facebook party too. And the Pinterest party. I'm still avoiding the Twitter party. And I also avoided the Instagram party...until I decided to enter that Nature Walk Sewing Contest (I mentioned in my last post).

To enter that contest, I had to use social media and use a hashtag and everything. Which meant I had to start using Instagram.
Easter Dress from Cottontail line from Hawthorne Threads
And that has spurred my desire to try a little bit of everything.

Because entering that contest opened up to me a world of people who sew/create for little girls. Boutique owners, talented seamstresses, fabric designers, fabric manufacturers, sewing pattern designers...are all part of their own world. And I feel like an alien peeking in. I have looked at images of all these adorable dresses, fabrics, and patterns and I think: "Hey, I could try that for awhile."

Vintage style dress I made from Straight Grain's Tinny dress pattern
So that's why in a matter of a few weeks, I will have made 4 dresses (2 more to come and add on Instagram before this ride is over) and a skirt for a two-year-old who doesn't need that many dresses....Because when I decide to do something, I go full throttle until I get burnt out. But not to worry when I get burnt out, because there are always more worlds to explore.

You can find the Easter dress pattern I used here: Made for Mermaids
and the vintage dress pattern I used here: Straight Grain
The Bean trying on dress, post-nap (after I finished it)
Sometimes I'm a voyeur of the quilting world. You can't call me a quilter, although I like to make quilts. But I'm not devoted solely to quilts, nor am I great at it. I like to make a stuffed rabbit one day, a doll the next, focus on some dresses for awhile, then quilts, then felt ornaments...and that's how it's going. You can't call me a seamstress, although I have recently been sewing up a storm of little girl clothes, because again, I'm not great at it, and it's not all I do.

So....ADD Crafter. That's what I am. And I'm sure I'm not the only one in this world.
Easter Bunny in the works (I'm actually working on the pattern after this: this one looks like a dog)

Twelve Days of Christmas Ornaments (designed by mmmcrafts): from goose a--layin' to partridge and the pear

And when I'm tired of creating stuff out of fabric and felt...I move on to the baking. I've got rolls rising as I type this. Mmmm. Because I finished a dress yesterday, and I'm taking a little break (and mostly was in the mood for rolls). But during nap time, watch out: I'll be making a doll for a friend's little girl. Because I'd rather do all of this than laundry. Or cleaning. Or organizing. And sometimes showering......

So there's a little insight into why this blog/me is all over the place. It's just my space to express something, and to avoid my responsibilities.


Tuesday, March 1, 2016

Spring Sewing is in the Air!

Yes, I know my last post was about pumpkin, which is traditionally a Fall thing. And I've been hand-sewing Christmas ornaments too, so I may be a little confused, but.....

Spring is on it's way!! Yippee!

Now, living in California, this doesn't have as much of an impact as when I used to live where it snowed. No matter what, when March came, even if there was snow on the ground, I would get excited. Because it meant that the short, dark, cold days were coming to an end. I no longer live in the snow, but I still love the end of Winter and I love that it's March.

Now that I have a new sewing hobby in my life, it also means that new Spring fabric lines are coming out, which is also kind of exciting. I get emails with alluring photographs of new colorful fabrics and beautiful projects made with them, and well...I succumbed to buying some bright Spring fabrics to try to make my own cute things.

One of my favorite fabric designers is Tamara Kate, and she came out with her new line called "Nature Walk." I love it. So I bought some. One of the fabrics is a panel of all of the letters of the alphabet, so that is fun. I decided to use the "e" and make my little bean a toddler messenger bag to take to preschool (which she just started and loves and calls "me-school").

I did something I haven't done before, either. I entered a sewing contest that Tamara Kate and Michael Miller fabrics was hosting. Eek. It ended yesterday. I don't think I'll win (they haven't announced yet) because there were some pretty amazing entries, but it was fun to try nonetheless. I was wanting to make a bag for the bean anyway, and the contest got me motivated.

I had to incorporate the Nature Walk ABC panel in some way, and use other fabrics from the line. So I entered my bean's little bag, which I designed myself.


 Here is what the panel looks like. Super cute!


I pieced together the body of the bag with different fabrics from the Nature Walk line:


I love the colors of the fabrics. My only regret is I think I incorporated too much of the solid pink. I was able to work on my piecing skills again, and even my embroidery, as I embroidered the flower and moth. And the bag is also quilted ("in the ditch" mostly, with some decorative lines on the gray fabric).

Look at all those triangles. They give you a closer view of the fabrics, too.


I added some turquoise piping to the flap of the bag.


The center of the flower is embroidered with a bunch of french knots, and I filled in the petals of the flower with a gradient of 3 different colors. I didn't get as fancy with the moth...which by the way, did you know that elephant moths are bright pink and green? I did not. Until I did a little research before starting my embroidery.

The inside of the bag is lined with the green and white fabric called "Tall Grass" which comes in different colors:


After I made the bag, I had almost the entire ABC panel left (since I only used the "e"). I used the rest of the panel to make a ruffled tiered skirt for the bean, too, which she wore proudly:


And then she was done with pictures. Photo session length: 5 minutes. Not bad for a two-year-old. She was less cranky than the 12-year olds who were along for the ride.


To make the skirt, I used the length of one row of letters (the width of fabric-45 inches) for the first tier (Each row of letters on the panel was 8 inches tall, so that is how tall I made the tiers), and I sewed a row and-a-half together for the second tier.

I sewed along the top with a basting stitch, pulled the bobbin thread to ruffle it, and matched it to the first tier. I ruffled the first tier (with a basting stitch and pulling bobbin thread again) and attached it to the waist-band.

(I did the waist-band like this tutorial here, except mine was smaller--because I used the Bean's waist measurement-- and the width of my waist band was about 2 inches).

Then I added a trim of the light turqoise fabric on the bottom, about 2 1/2 inches long. I hemmed it and ta-da! Quick little skirt.

Now I can say that it feels like Spring!


Thursday, February 11, 2016

Whole-Grain Pumpkin Oatmeal Spice Muffins

This past December, Costco had canned organic pumpkin puree on sale for a steal! So I gave flats of canned pumpkin to my family members as Christmas presents. Because the bakers in my family love baking with pumpkin. And it was cheap. Super cheap.

So now that they (and I) have pumpkin coming out our ears, what are we to do with it?

How about this muffin recipe for starters?

These stay nice and moist because of the canned pumpkin.  And as a very big plus, they are made with whole-grain wheat flour and whole oats, so they're packed with whole grains along with a hefty dose of Vitamin A. It's rare when you can get a moist baked product using whole-wheat flour, but because of the pumpkin, these fit that bill.

Each muffin boasts 24% of your Daily Value for Vitamin A, 3.2 grams of protein, and 2.3 grams of fiber. So eating a couple of these babies as part of your breakfast gets you off to a good start for the day! But let's face it, taste is paramount, so best-of-all: these muffins taste great! And that's what I care about most. And my kids.

In fact, this morning was kind of interesting: my 2-year old Bean refused to eat any food. I was baffled by this. I offered her plenty of her usual favorites (yogurt, fresh pear). I even offered her a chocolate chip cookie: not because I was desperate for her to eat (I knew she would eat eventually), but because I wanted to see how far she was willing to go in her denial of favorite foods. She turned the cookie down. Wow.

But after these muffins came out of the oven, her interest in eating resurrected and after eating a bite she declared, "yummy cupcake!" and then requested yogurt and pears to go along with it. Lucky for me, she forgot about the aforementioned and previously offered chocolate chip cookie. Or maybe I'm not giving her enough credit: perhaps after eating a variety of foods until she was satisfied, she wasn't interested in a cookie. Or maybe I'm just overthinking it...


I kind of combined two of my favorite recipes for this (oatmeal muffins that I make on a fairly regular basis, and pumpkin muffins that are also a favorite). What if you don't like pumpkin? Substitute the pumpkin for applesauce and you'll still have a great whole-grain, delicious and moist muffin.

So without further ado, here is the recipe for the "yummy cupcake" whole grain pumpkin oatmeal spice muffins.

Whole-Grain Pumpkin Oatmeal Spice Muffins

yields 24 muffins

2 cups whole oats
1 cup milk
1 cup canned pumpkin puree

2 eggs
1 cup dark brown sugar
1/3 cup vegetable oil

2 cups white whole wheat flour
2 tsp. baking soda
2 tsp. cinnamon
1 tsp. salt
1/2 tsp. ground cloves
1/2 tsp. ground ginger
3/4 tsp. nutmeg

1. Pre-heat oven to 350 degrees Fahrenheit. Line muffin tins with cupcake liners or parchment liners. Meanwhile, thoroughly mix oats, milk, and canned pumpkin together in large bowl. Allow the oats to sit for 15 minutes to absorb some of the liquid.

2. In a separate bowl, beat the eggs, sugar, and vegetable oil until well mixed, about 1 minute.

3. In a third bowl, sift together the white whole wheat flour, baking soda, salt, and spices. 

4. After the oats have soaked in the pumpkin/milk mixture, add the egg/sugar/oil mixture and mix until combined. Add the flour mixture to the rest and stir together until the ingredients are incorporated. 

5. Fill each muffin cup 2/3 full. Place in oven for 18-20 minutes, or until a toothpick comes out clean. Allow to cool in pan for five minutes before removing the muffins to a wire rack. Enjoy!


These are going to be a new family favorite for sure!


Monday, February 8, 2016

Conversation Heart Pillow Tutorial

We had another birthday around here. I was all geared up for making some spectacular cake for my new 12-year-old. He's prone to liking lemon cakes. So I was excited to see what we could come up with. But when it came down to it, my newest adolescent asked for a simple Texas Sheet cake. It was uncomplicated and sweet, just like him. I have a feeling raising a teenage boy might be a little easier than raising a teenage girl....but we shall see...

He also (like his older sister before him) requested cinnamon rolls for breakfast and pot stickers for dinner. And he would like to take chocolate chip cookies to school tomorrow (because today is a holiday for him). So yay for a three-day weekend to kick off your thirteenth year! Speaking of holidays....

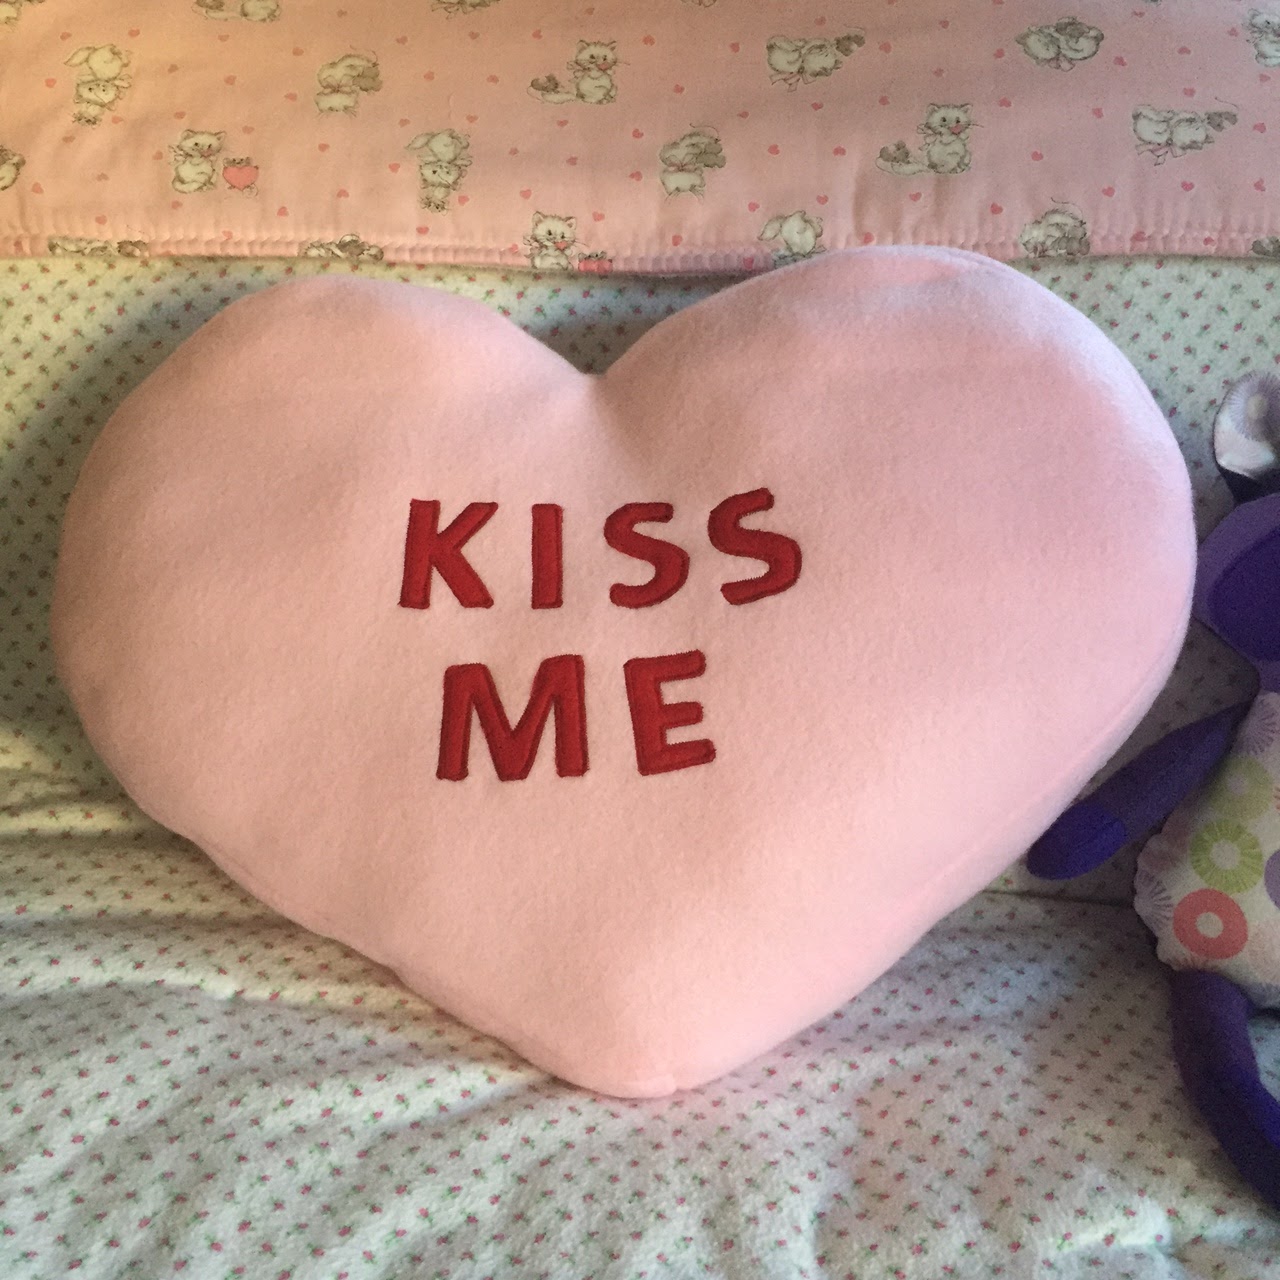
Valentine's Day is less than a week away! And what says Valentine's Day more than those hard little Conversation Heart candies? Since I'm fond of making plush things, and since I couldn't make a lemon cake, I decided to make a Conversation Heart pillow! I have a purple one in the works too. It's not too difficult, and it makes me feel like I actually decorated for a holiday, so that's a plus!


All that is required is the ability to make a heart shape (or half a heart shape really), and a printer to print off some letters in "Word" at 200 size. I used the font "Calibri" in all caps. Here is what else you will need in case you want to make some of your own:


  • 1/2-3/4 yard fleece color of your choice
  • scrap of red felt large enough for you to cut out your desired letters
  • sewing machine and matching threads (red thread and thread to match the fleece)
  • hand-sewing needle (just a small amount of hand-sewing is required).
  • polyfil stuffing
  • optional: washable glue stick
See? Not much. In case you don't trust your heart-drawing skills, I'll attach the heart shape I used in a google doc. conversation heart pattern here

The pattern will print out in 2 pages, Tape them together where it indicates (the pages will be taped together in landscape), and then cut out your half heart shape. 

I used a 1/2 inch seam allowance.

1. Trace your half-heart onto fleece that is folded over. Line the center of the heart (the straight edge) against the folded edge of the fabric. You will need to do this twice as you need two hearts. After tracing, pin the hearts and cut them out. 

You will also need to cut out two strips of fabrics to make up the side of the heart pillow. If you are using the pattern I drew, your two strips should measure 30 1/4 inches x 4 inches each.  

Don't worry if you drew your own heart, I will tell you how to get the measurement for your strips in just a minute...


If you are using your own heart that you drew, here is where you have to get creative to find the length your strips of fabric should be. I used a string to measure along the outside (circumference) of my heart. Then I measured my string and added an inch (to account for seam allowance). I decided to make my strips 4 inches wide, because with seam allowance, that would give me a 3-inch thickness of pillow. You can make your strips larger if you want. 
You can see I loosely taped on some string around the border of the heart (half-heart) I drew. That measurement happened to be 29.25 inches. So I added an inch since I will be sewing the two strips together (to account for seam allowance).
2. Trace and cut out your letters from red felt. As I said above, I printed out the letters I wanted in Word, at a font size of 200, and I used the font "Calibri" in bold and in ALL CAPS. I then cut them out (giving myself a little extra paper around each letter), traced them onto the felt, and cut out the felt. You can have fun, adding whatever saying you'd like!
You can see how I cut out around the letters to make them slightly larger/thicker.


 3. Arrange the letters on your pillow front (on the correct side of the fleece). If you look at real conversation hearts, you see that often there is one word above the second word, which is why I placed my words this way.

Then using a glue stick, I glued the letters on to the front to hold them in place while I sewed them on. I sewed them on using a zig-zag stitch that was a width of "3" on my machine, with a length of 1.5. Feel free to experiment with the size of zig-zag you prefer.

I went slowly around those curves and corners.


sewing letters on with zig-zag stitch


Letters are all appliqued on here (sewed on using the zig-zag stitch).
I guess if you didn't want to do a zig-zag stitch, you could always just do a straight stitch along the very edge, outlining each letter. That would work too. My second "s" is a little crooked. Argh...

4. Sew your strips together, end-to-end (short ends), with fabric right-sides together. This will make a loop. The with the correct sides of the fabric facing each other, pin the pillow top to the loop, matching the seams at the top and the bottom of the heart. Sew with a half-inch seam allowance.
sewing strips together

strips sewn together; I finger-pressed this seam open. 

I pinned the strip to the pillow-top, with right-sides together. 
5. Attach the bottom of the pillow. You will now pin the bottom pillow (heart) piece to the un-sewn part of the strip.with right-sides together. The pillow will look inside-out as you do this. Sew together with a 1/2 inch seam allowance again, but MAKE SURE TO LEAVE A 4 INCH GAP unsewn where you will turn the pillow right side out. 

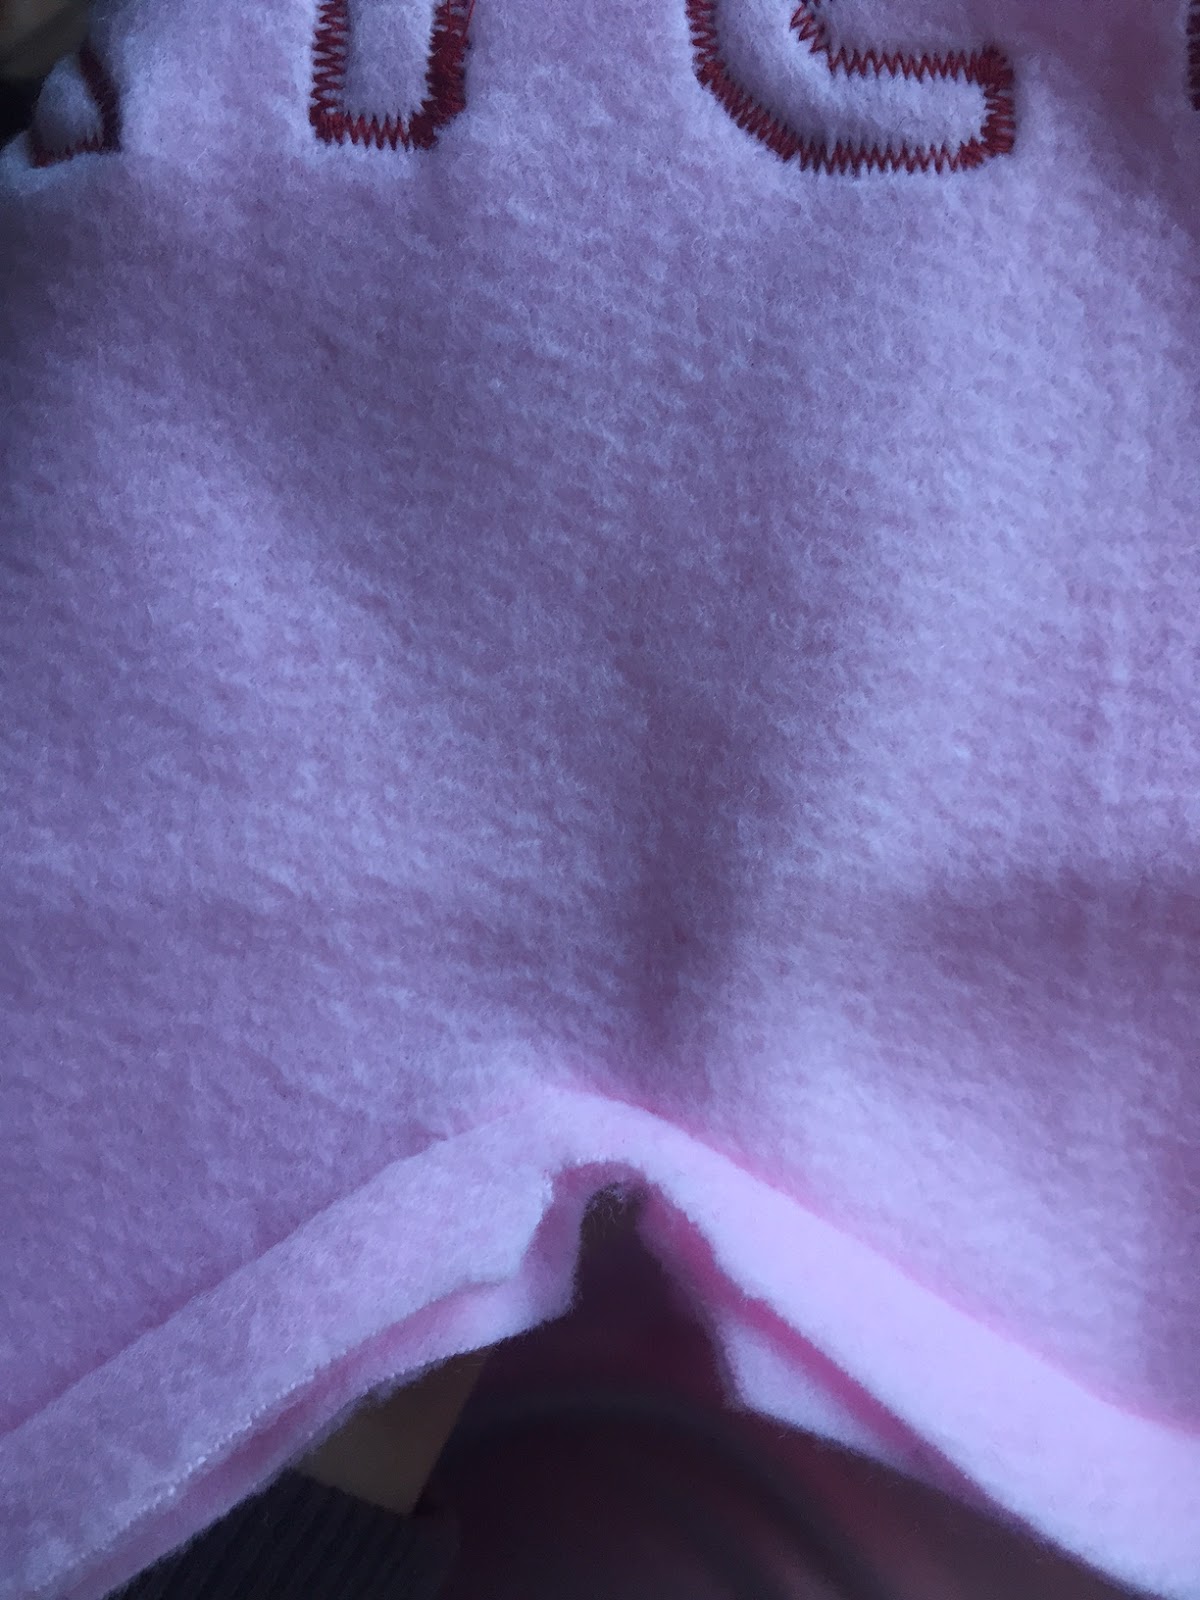
But before you turn your pillow right side out, you need to clip your seam allowance, especially on the curves so that your pillow will lay/lie? right. (Alright grammar nazi's: which word am I supposed to use there?).

I cut notches out at the top of the heart, and clip perpendicular to the stitches for the rest (see the pics).
notch cut out at top corner of heart

little slits in the seam allowance

pillow with seams clipped, prior to turning right-side out.
6. Turn the pillow right-side out through the gap that you left, and stuff it with polyfil stuffing until your heart's content (see what I did there?). Then pin the gap closed and hand-sew it shut using a ladder stitch (so that it looks invisible). 
pillow turned right-side out, but unstuffed

pin the gap shut and hand-sew it together. 
7. Admire your pillow!
I had to add that little purple raccoon in there. I just finished her yesterday :) She'll be in my etsy shop soon. 


Happy Valentine's Day!